Publish a post to your audience
Invite a relevant audience to your presale, or publish an update on a page. Check access, exclusions and delivery before sending.
Use a post to invite people to a presale, share a ticket link or publish practical event information. Choose the audience, add a clear action and check who can receive the message before sending.
Choose a page destination when people should be able to find the post there, or Send-only for a message to selected people without a page listing. You need permission to manage posts for the organisation you are working in.
Choose where the post appears and who receives it
A post has three separate choices:
| Choice | What it controls |
|---|---|
| Destination | Whether the post appears on a Community page, an event page, or is Send-only. |
| Access | Who can read the post. A public page does not make a members-only post readable to everyone. |
| Notifications | Whether eligible people receive an email, a WhatsApp message, both or neither. |
The Community page destination is your organisation’s page. Choosing named Communities sets the audience scope; it does not create a separate post on each group’s page. See Your audience for the difference.
For an arrival update, attendees could read the information on the event page without another notification. If the team wants to send an update, it checks the eligible recipients for each channel separately from read access.
Creating a post does not connect WhatsApp, grant membership or make someone a subscriber. Use the recipient counts and any warnings in Send to check the people BASH can reach.
To use contacts from a Brevo or Mailchimp list as post recipients, add that list to BASH first. Follow Sync Brevo or Mailchimp lists. An imported phone number does not record WhatsApp consent; check the eligible count for that channel in Send.
Invite people to a presale
Start with an existing presale sign-up form. If you still need one, follow Set up a presale. You choose whom to invite; sharing the presale does not choose the audience for you.
- Open the presale in your organisation dashboard.
- Open Share, then select Share sign-up link in post. The composer opens with starter text and a presale sign-up action.
- Add your announcement, subject and artwork in Content. Keep the sign-up action so recipients can open the matching form.
- Choose the relevant Communities, if shown. For a targeted invitation, choose Send-only, then Select people to build the audience using your event audiences, groups or individual contacts.
- Review the suggestion about people who have already signed up for the linked presale. Select Exclude if you want to leave those people out.
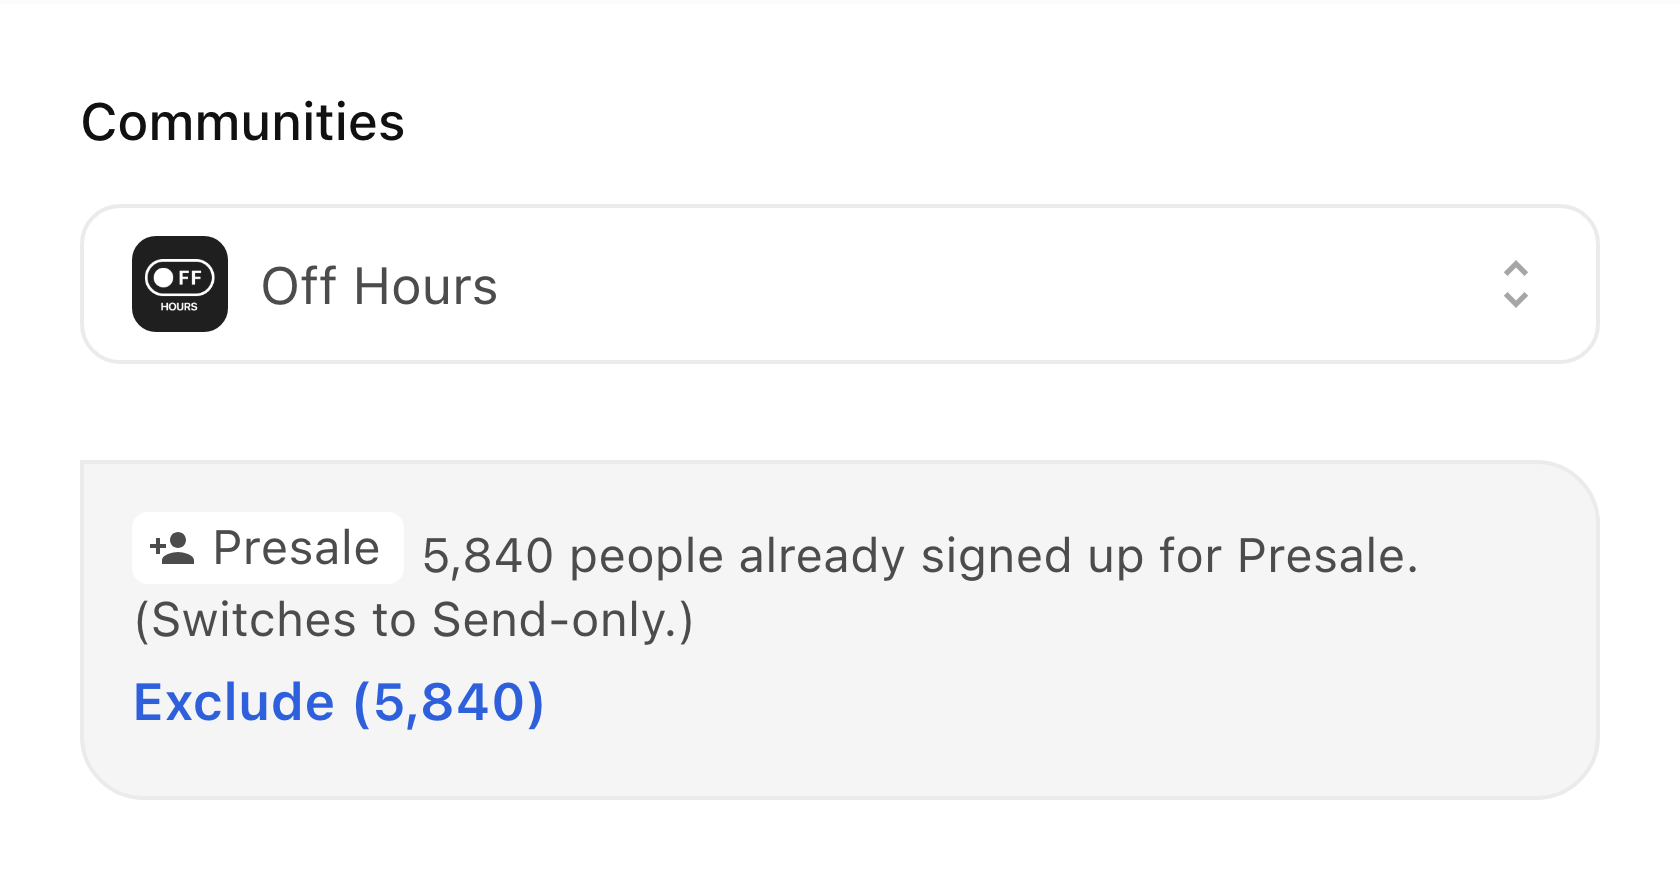
The exclusion is optional. Applying it makes the post Send-only if it was previously a page post: it will not appear on the Community or Event page. It changes the selected people who can read the post, rather than only reducing the people receiving a notification. Use Undo if that is not what you intended.
The suggestion appears when BASH finds existing sign-ups in the chosen audience and can identify one relevant action. If it is missing, check the selected audience and sign-up action. Several unrelated actions can prevent a suggestion. Adding the action alone does not exclude anyone.
- Select Next to check Schedule, then continue to Send and choose email, WhatsApp or both.
- Check each channel’s eligible recipients, then continue to Review. Check Who can read, Sending to and the publication time before selecting Send or Schedule post.
For a ticket reminder, the same flow can suggest excluding existing ticket holders when the action links to the event, or buyers of a particular ticket sale when it links to that sale. Review and apply the suggestion yourself; it is not an automatic exclusion.
What recipients see when they sign up
The presale action opens the matching sign-up form. When a recipient’s personal link or signed-in account lets BASH recognise them, the form can show their known identity instead of asking for those details again. If all required details are already available and there are no extra questions to answer, they can sign up in one tap.
A visitor may still need to enter missing details, answer the organiser’s questions or complete verification. A previous visit alone does not establish their identity. The post’s access rules also do not override the presale’s own sign-up access or opening time.
Open Posts
- Open your organisation dashboard and select Posts.
- Select New. The composer opens at Content.
- Check the organisation and the sender shown in the preview before writing.
Write your content
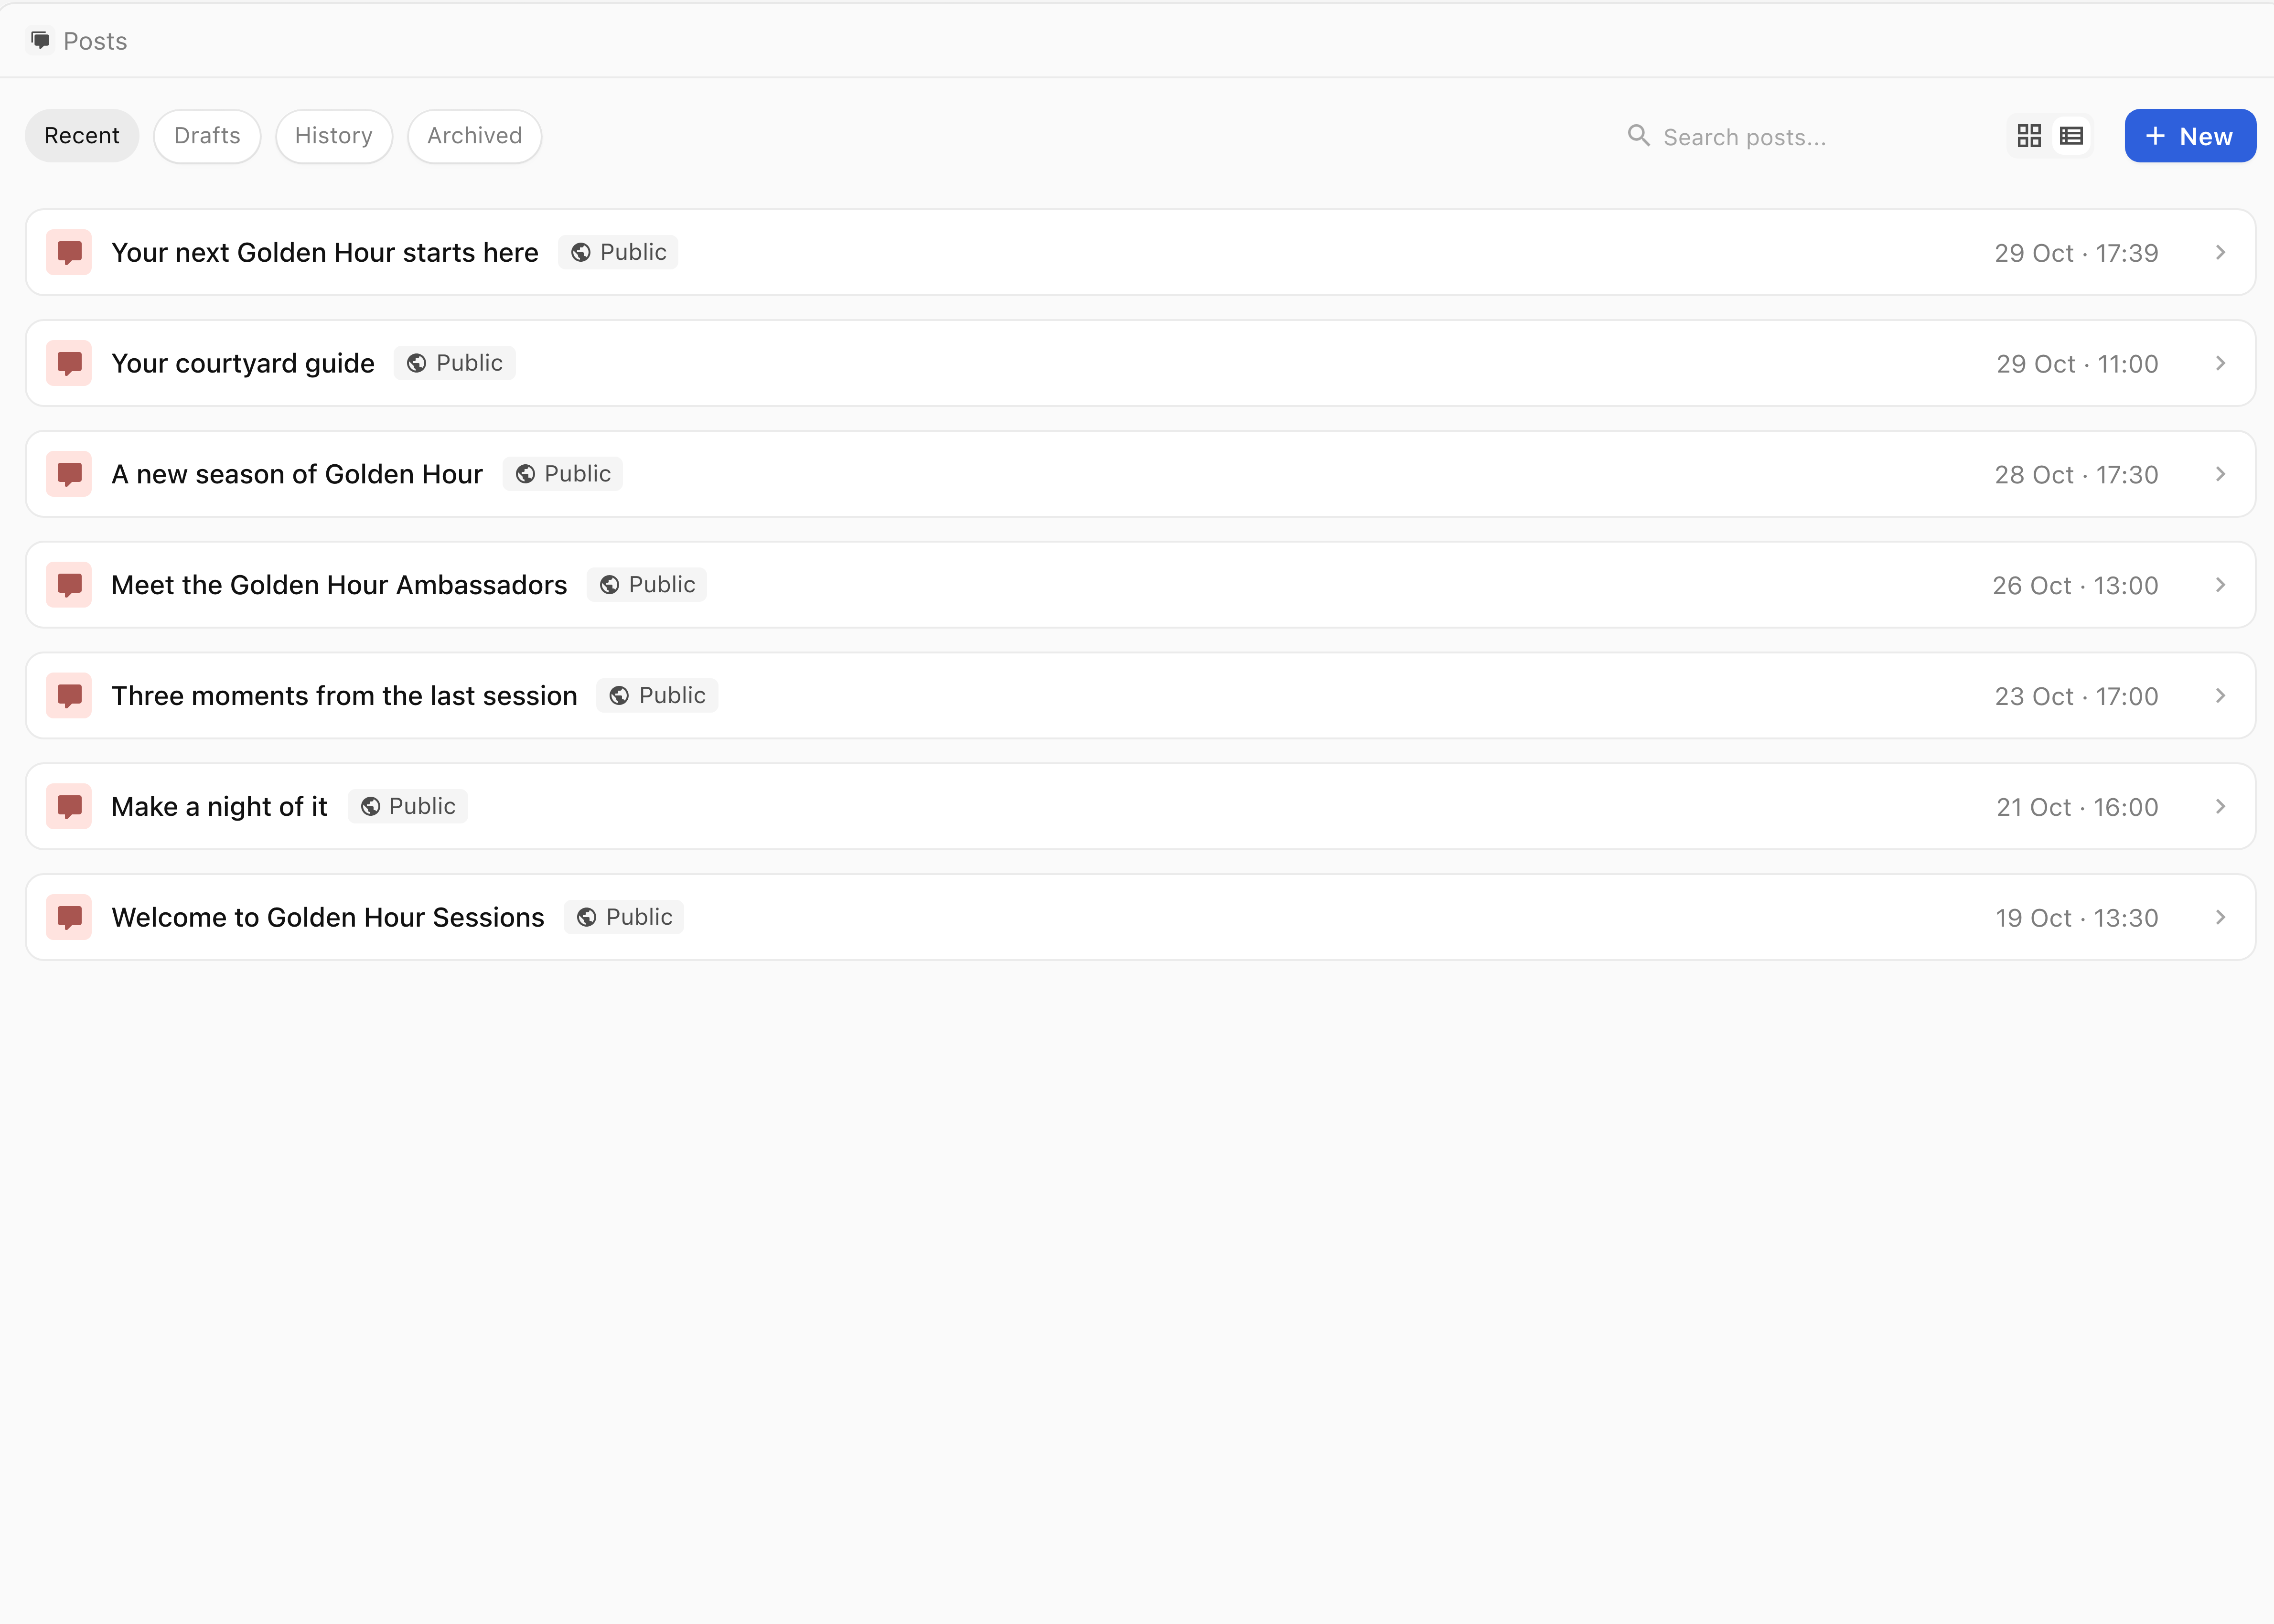
- If Communities is shown, use Choose communities to select the intended communities, or Organisation-wide for the organisation audience. Check the sender and recipients after changing the scope.
- Under Where should this be posted?, select the destination:
- Community page posts on your Community page.
- Event posts on the event page. Select the intended event.
- Send-only sends to selected people without listing the post on a page.
- Check the access control beside the destination. For example, a Community page post offers Visible to anyone or Members-only.
- If you choose members, select the intended member group. Access determines who can read the post; it does not guarantee notification delivery. For Send-only, use Select people to choose the audience. Review any suggested exclusion before applying it. The selected people are fixed when the message is sent; a scheduled send uses the people matching your selection at that time.
- Enter a Subject, then write your message in the editor. Use Insert if you need to add an image or action.
- Check the post preview and open any action destinations before publishing. On desktop, select Full screen editor for more writing space, then select Done to return.
- Select Next to open Schedule.
Choose the publication time
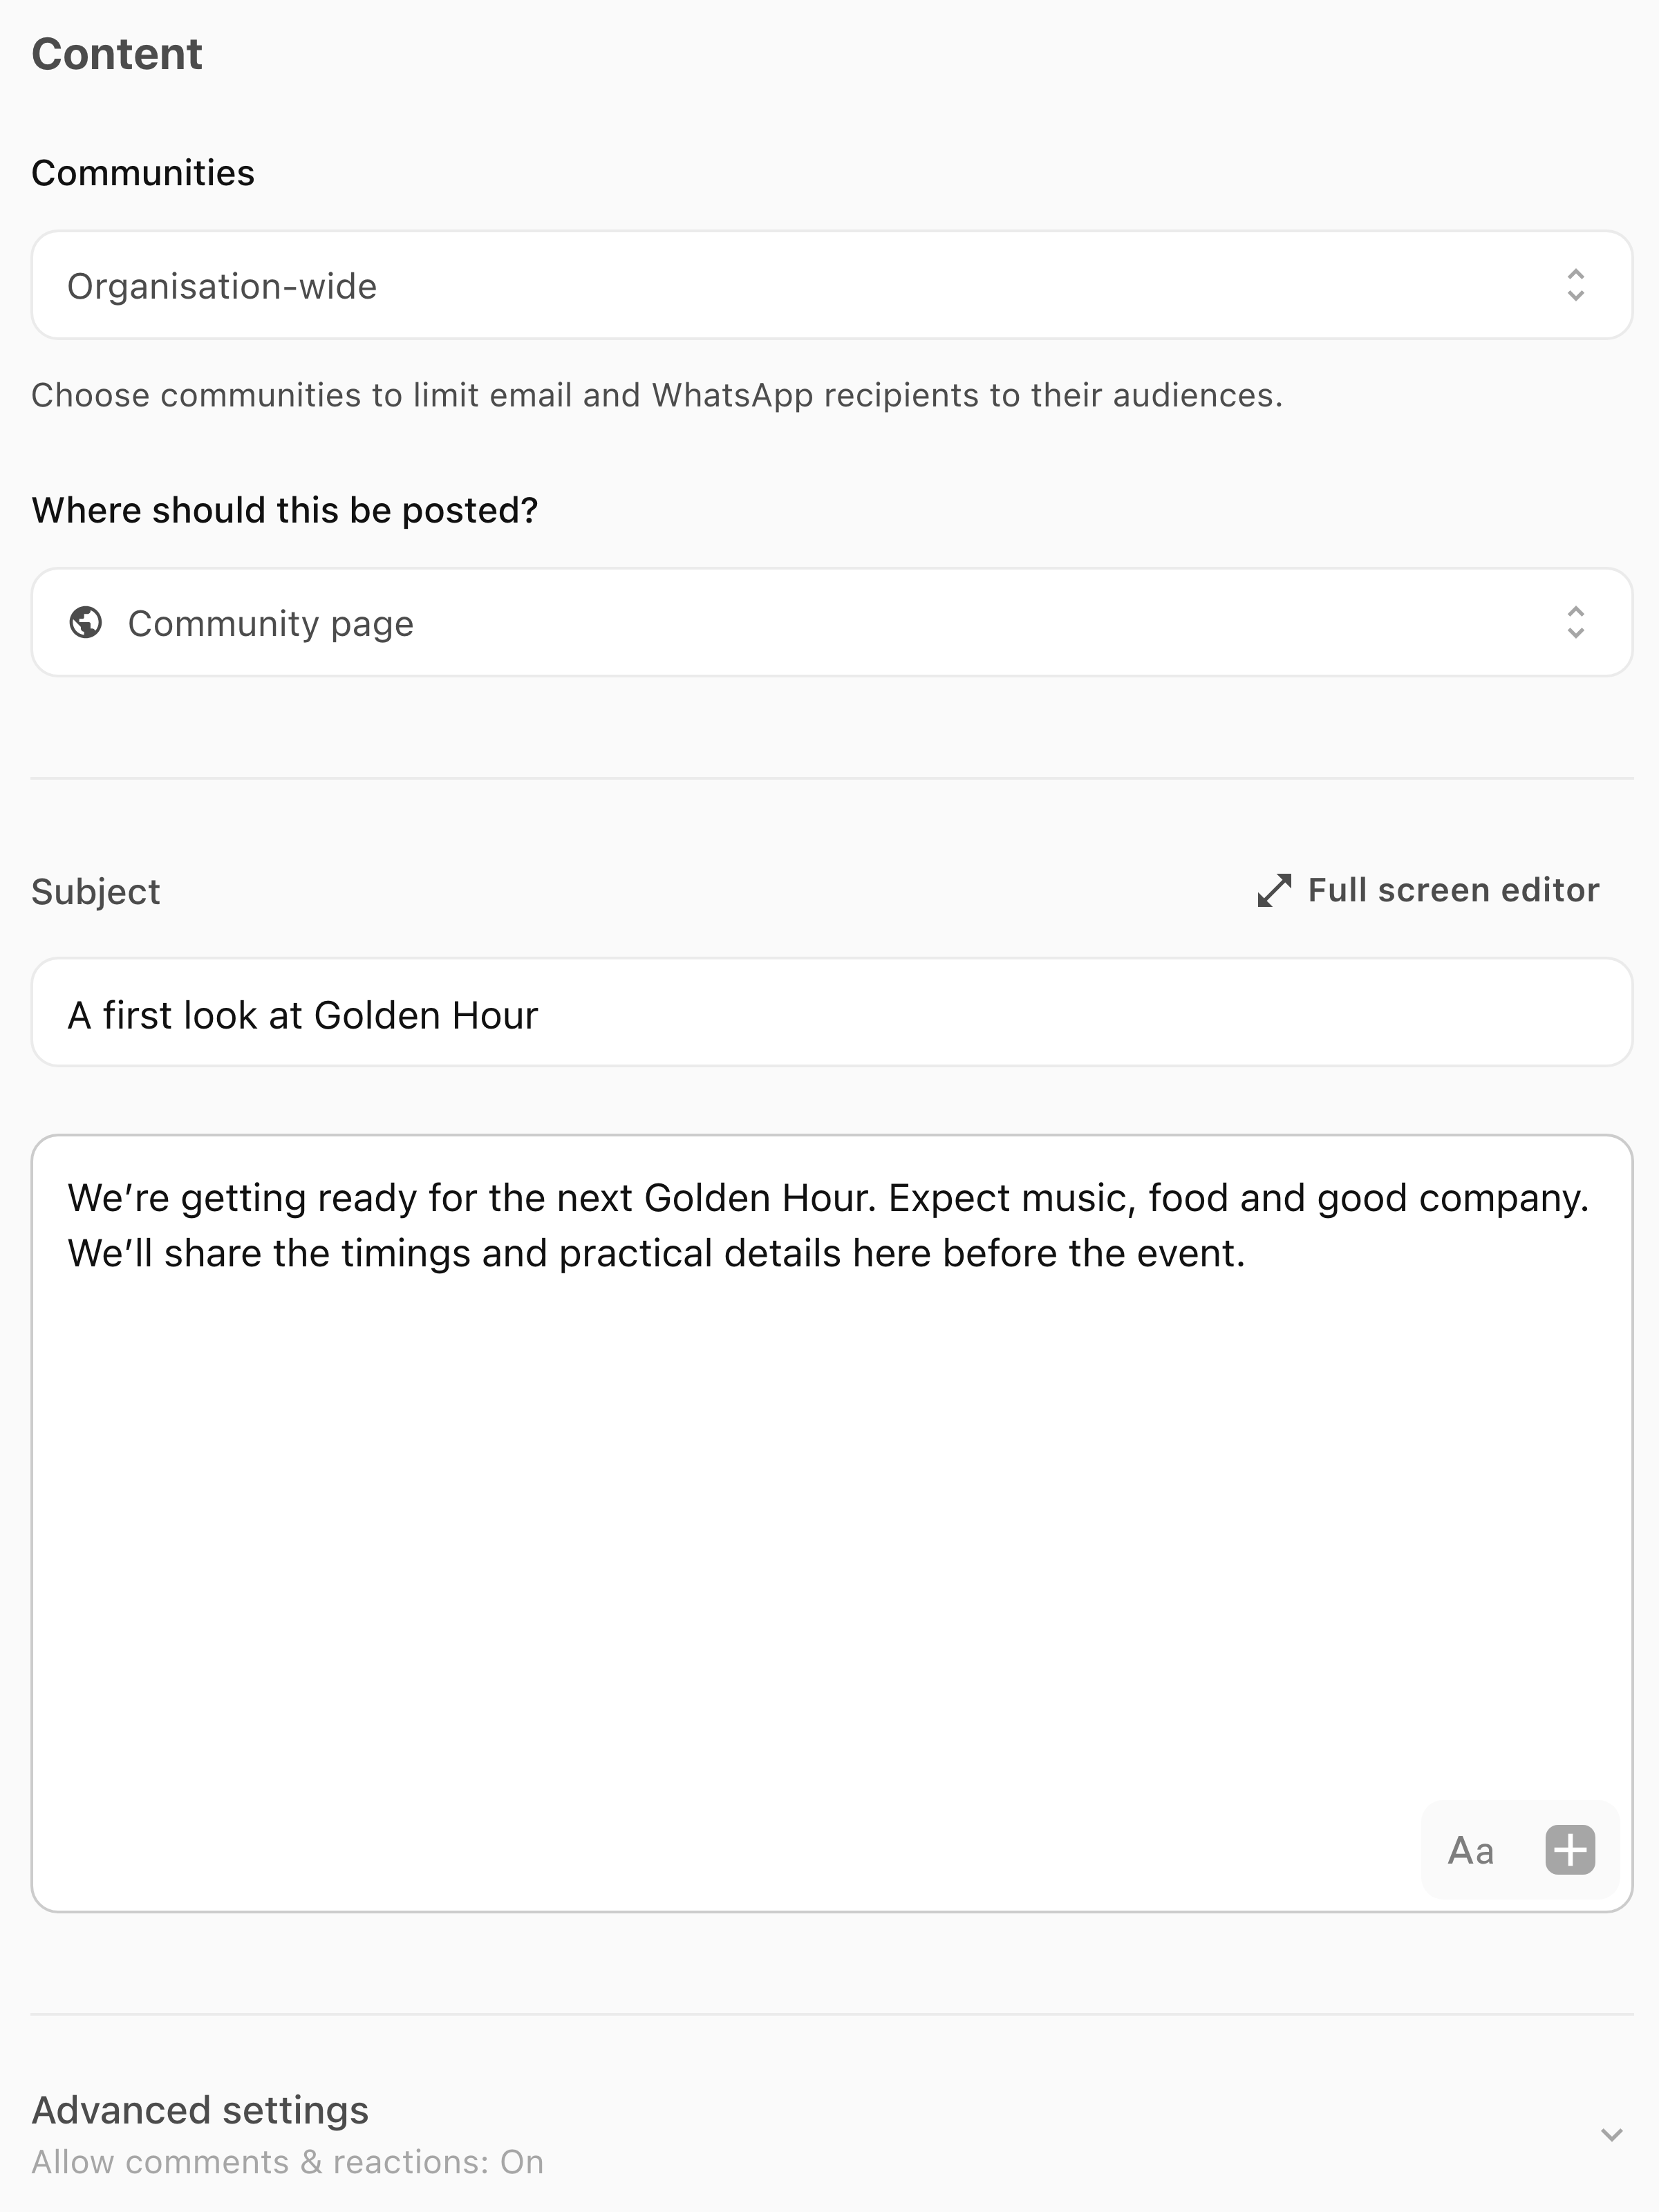
- In Schedule, check Opens. Keep Now for immediate publication, or open the date control and choose a future date and time.
- If you choose a date and time, select Done in the picker. To return to immediate publication, use Now in that picker.
- Select Next to open Send. Check the selected time and time zone again in Review before confirming publication.
Choose notification channels
- In Send, check the Email and WhatsApp switches. Turn off any channel you do not want to use. With both off, publishing sends no notification. A Send-only post needs a delivery channel.
- Read the eligible recipient count for each selected channel. Review whether Only send to people who signed up for email updates should be on, if the option is shown. The selected audience and reachable recipients can differ.
- If you enable WhatsApp, check its connection status and choose Send link to post or Send WhatsApp version. The latter has a separate Review message and Meta approval step. Follow Send a post through WhatsApp before continuing.
- Select Next to open Review.
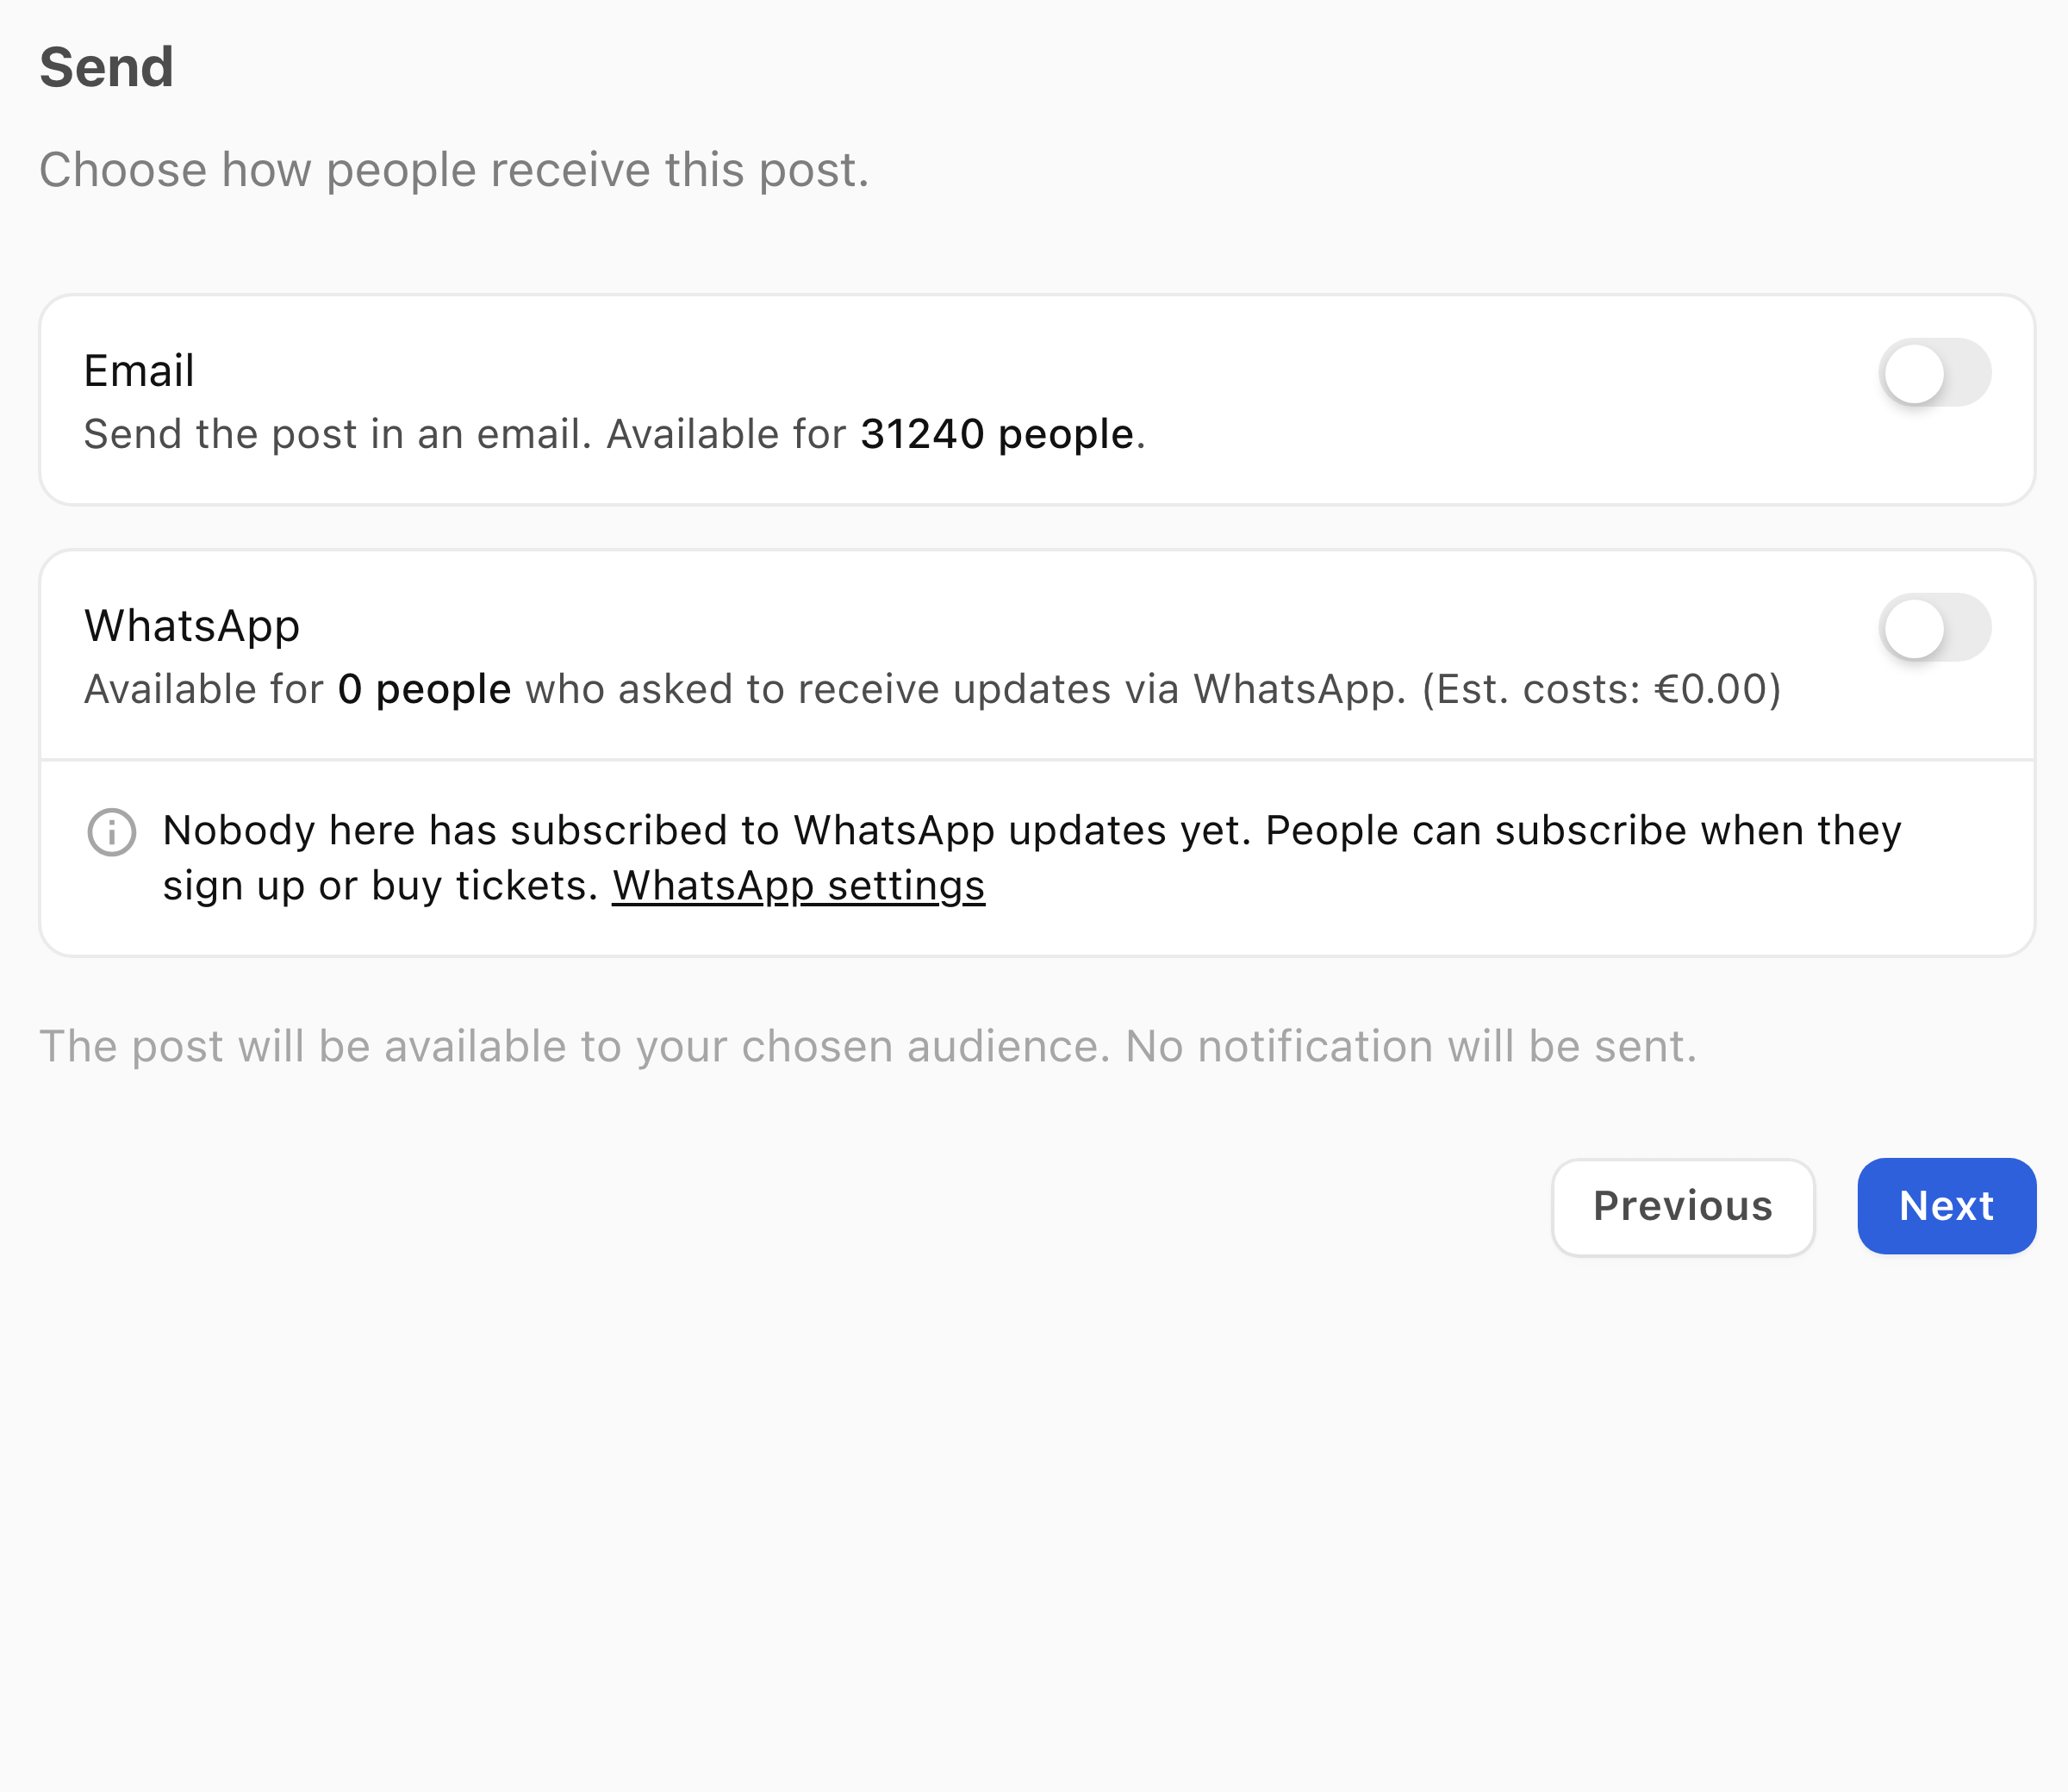
Review and publish
The final action applies your publication time and selected notification channels. Check these settings before confirming.
- Check the subject, message and actions in Content. Review summarises publishing settings; it does not replace checking the message.
- In Review, check Posted, Sender, Who can read, Allow comments and reactions, Schedule and Sending to. Check the displayed time zone.
- Use Change beside a setting to correct it. For publication timing, Change beside Schedule returns to the Opens control.
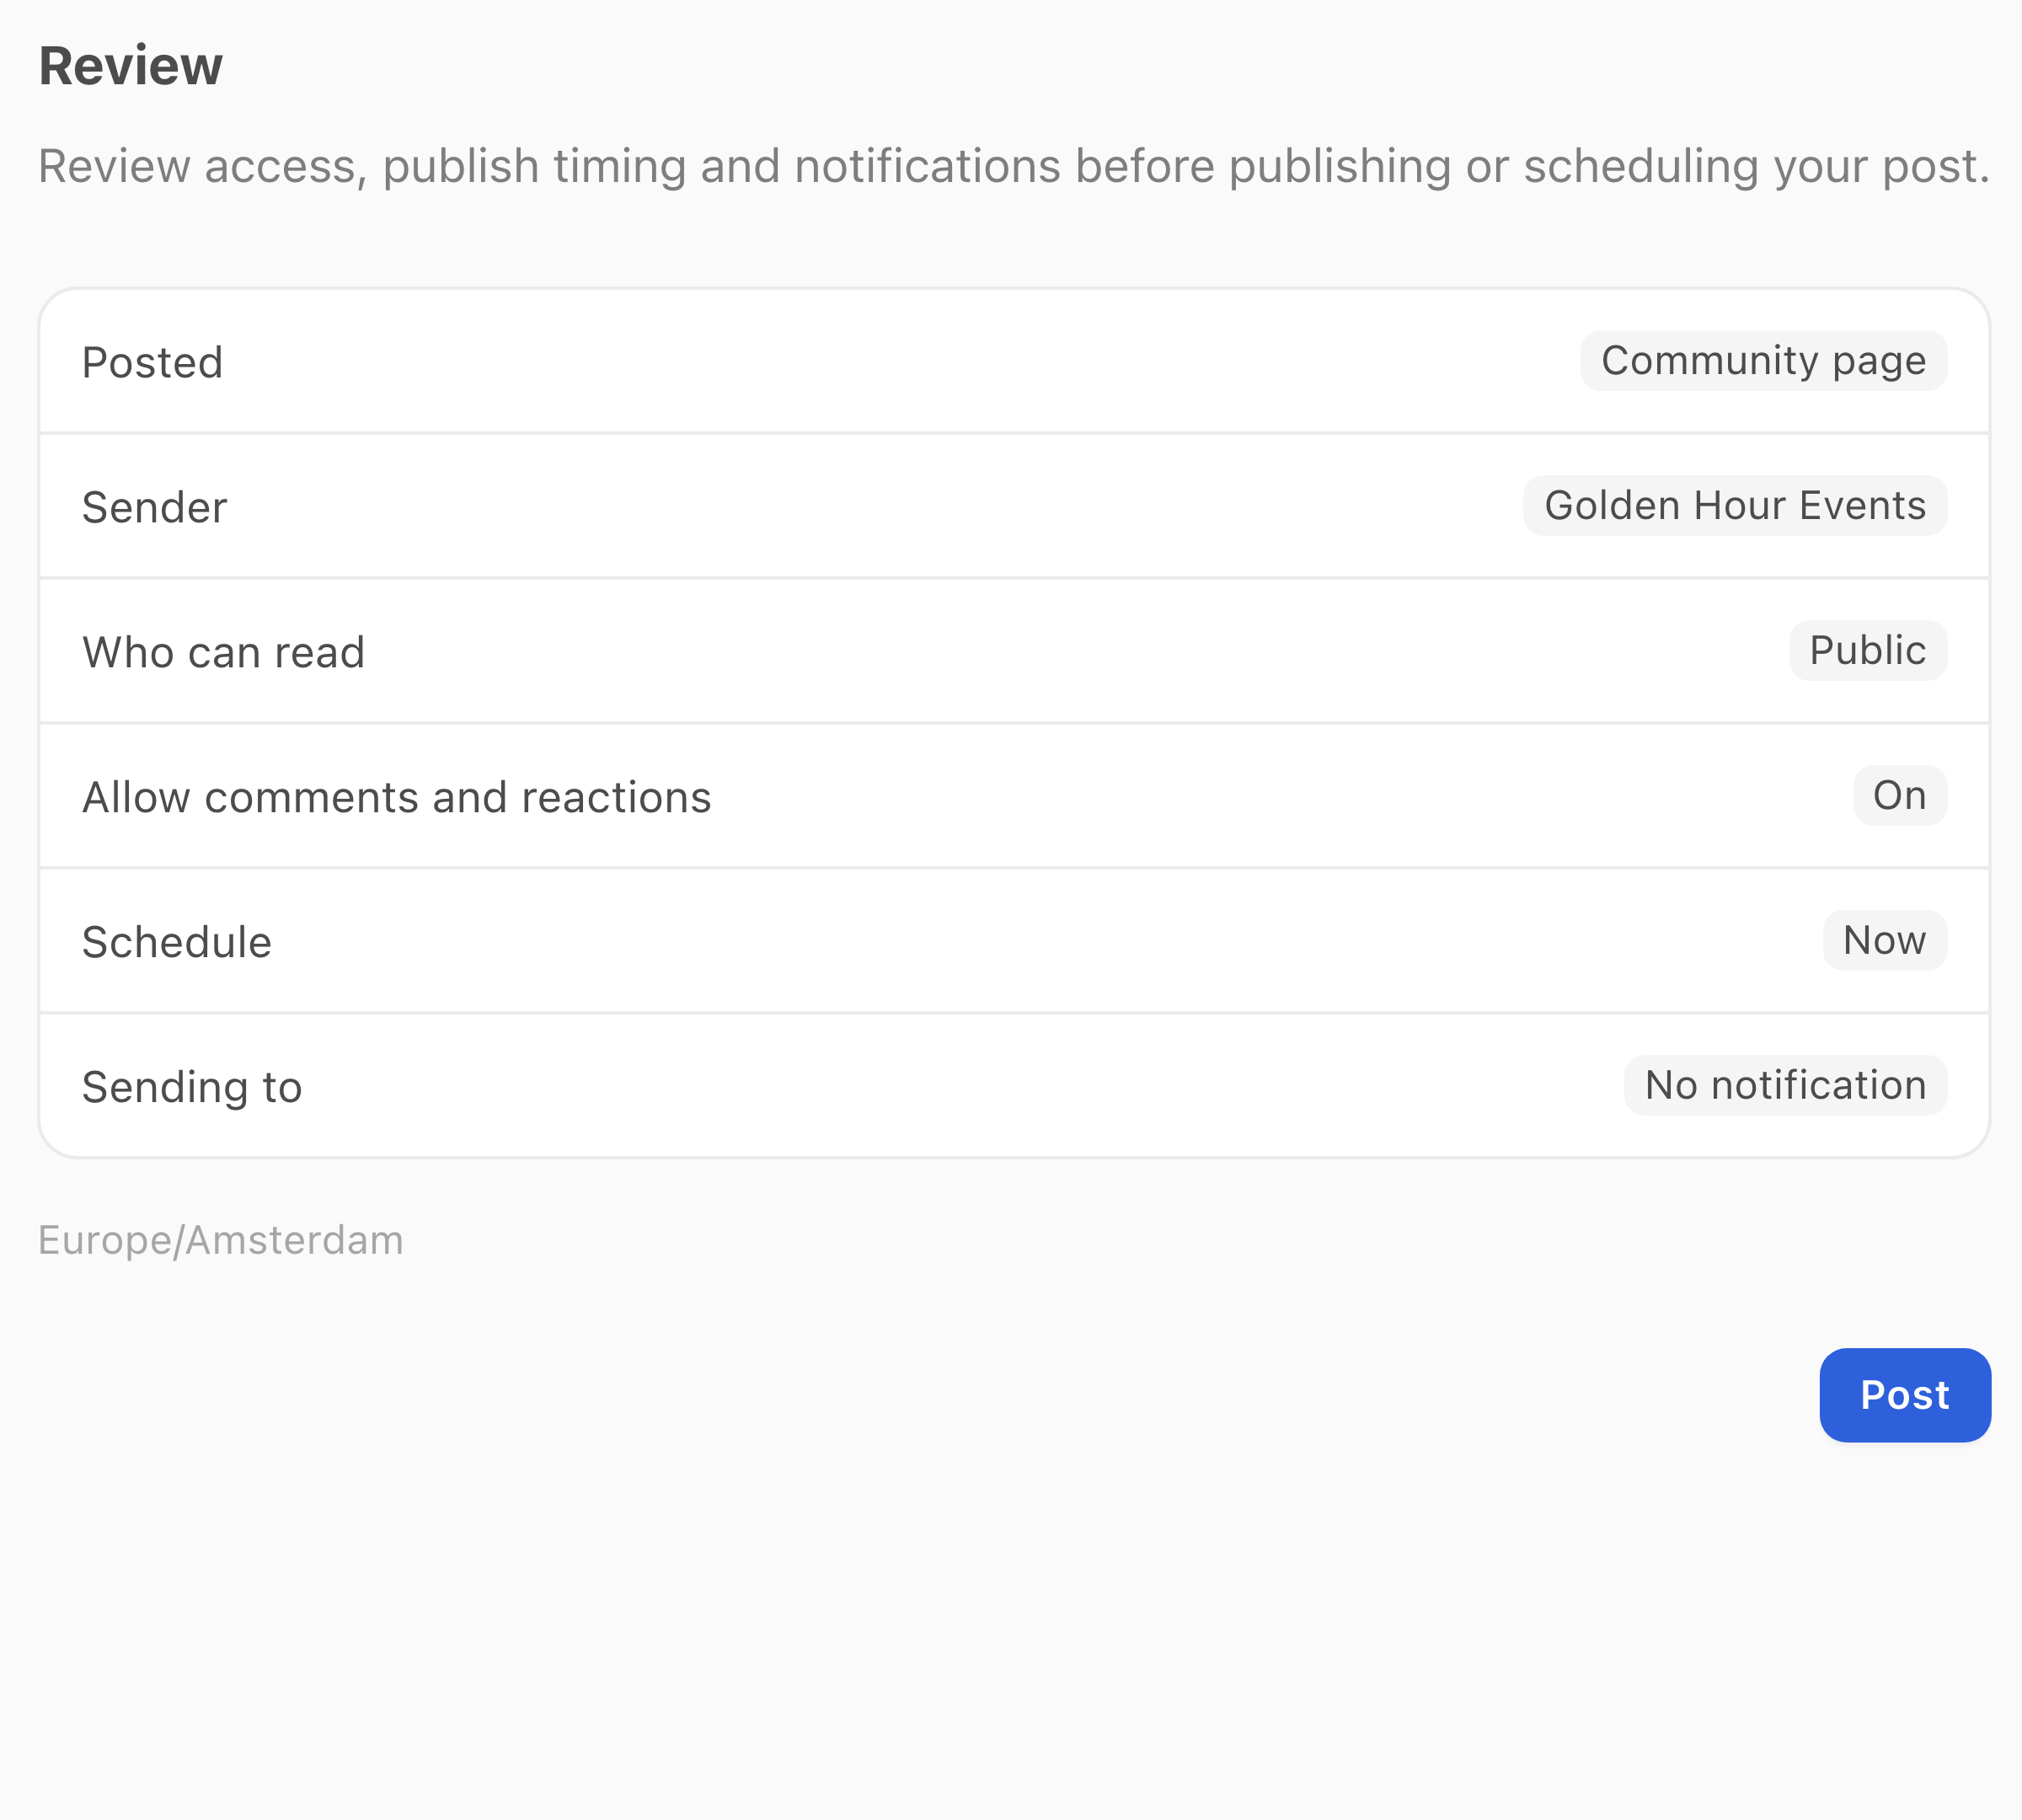
- Select the final action that matches your intention: Post for publication without notifications, Send & Post for publication with notifications, Send for Send-only, or Schedule post for a future time.
- Return to Posts and check the saved post and its status before creating another copy or sending again.
A scheduled or published post does not confirm that every notification was delivered.
Save and reopen a draft
- Select Save draft to save and return to Posts without publishing.
- Open the Drafts tab.
- Select the post to continue.
- Check that the saved subject and message are present before making more changes.
If you cannot publish
- A missing-content or access issue: return to Content and complete the highlighted field or selection.
- The post changed to Send-only after Exclude: the exclusion applies to who can read the post, so it removes the page listing. Use Undo to restore the earlier choice, or keep Send-only and check the selected people.
- WhatsApp approval required: select Review message and complete the approval step, or turn WhatsApp off in Send if you do not intend to use it.
- Not linked beside WhatsApp: use Set up, or turn that channel off. See Connect WhatsApp.
- Check status after an uncertain result: use that action and check Posts before creating another copy or sending again.
If you still need help:
- Select Need more help? Message support below this article.
- Include the organisation, post subject, step reached and error shown.
- Select Open support message and review the draft before sending it. Do not include private attendee links.