Set up a loyalty sale
Give ticket holders from another event access to your next ticket sale.
A Loyalty sale gives ticket holders from another event access to tickets for your next event. You can filter access by ticket type or recorded check-in.
Before you start
You need permission to manage the new event's ticket sales and access to the source event's ticket audience. Choose where the new event's tickets are managed before adding tickets. See Sell tickets for your event.
Ticket holders are not automatically subscribers to email or WhatsApp updates. If the source event uses a connected ticket provider, check that its ticket-holder audience is available in BASH before creating the sale. See Sync a ticket provider audience. If the sync is still running or reports an error, follow Check progress and fix problems.
Select the previous audience
- Open the new event from Events, then open Ticket sales.
- Select New, or Create ticket sale if this is the first sale.
- Choose Loyalty sale from the dropdown for this event.
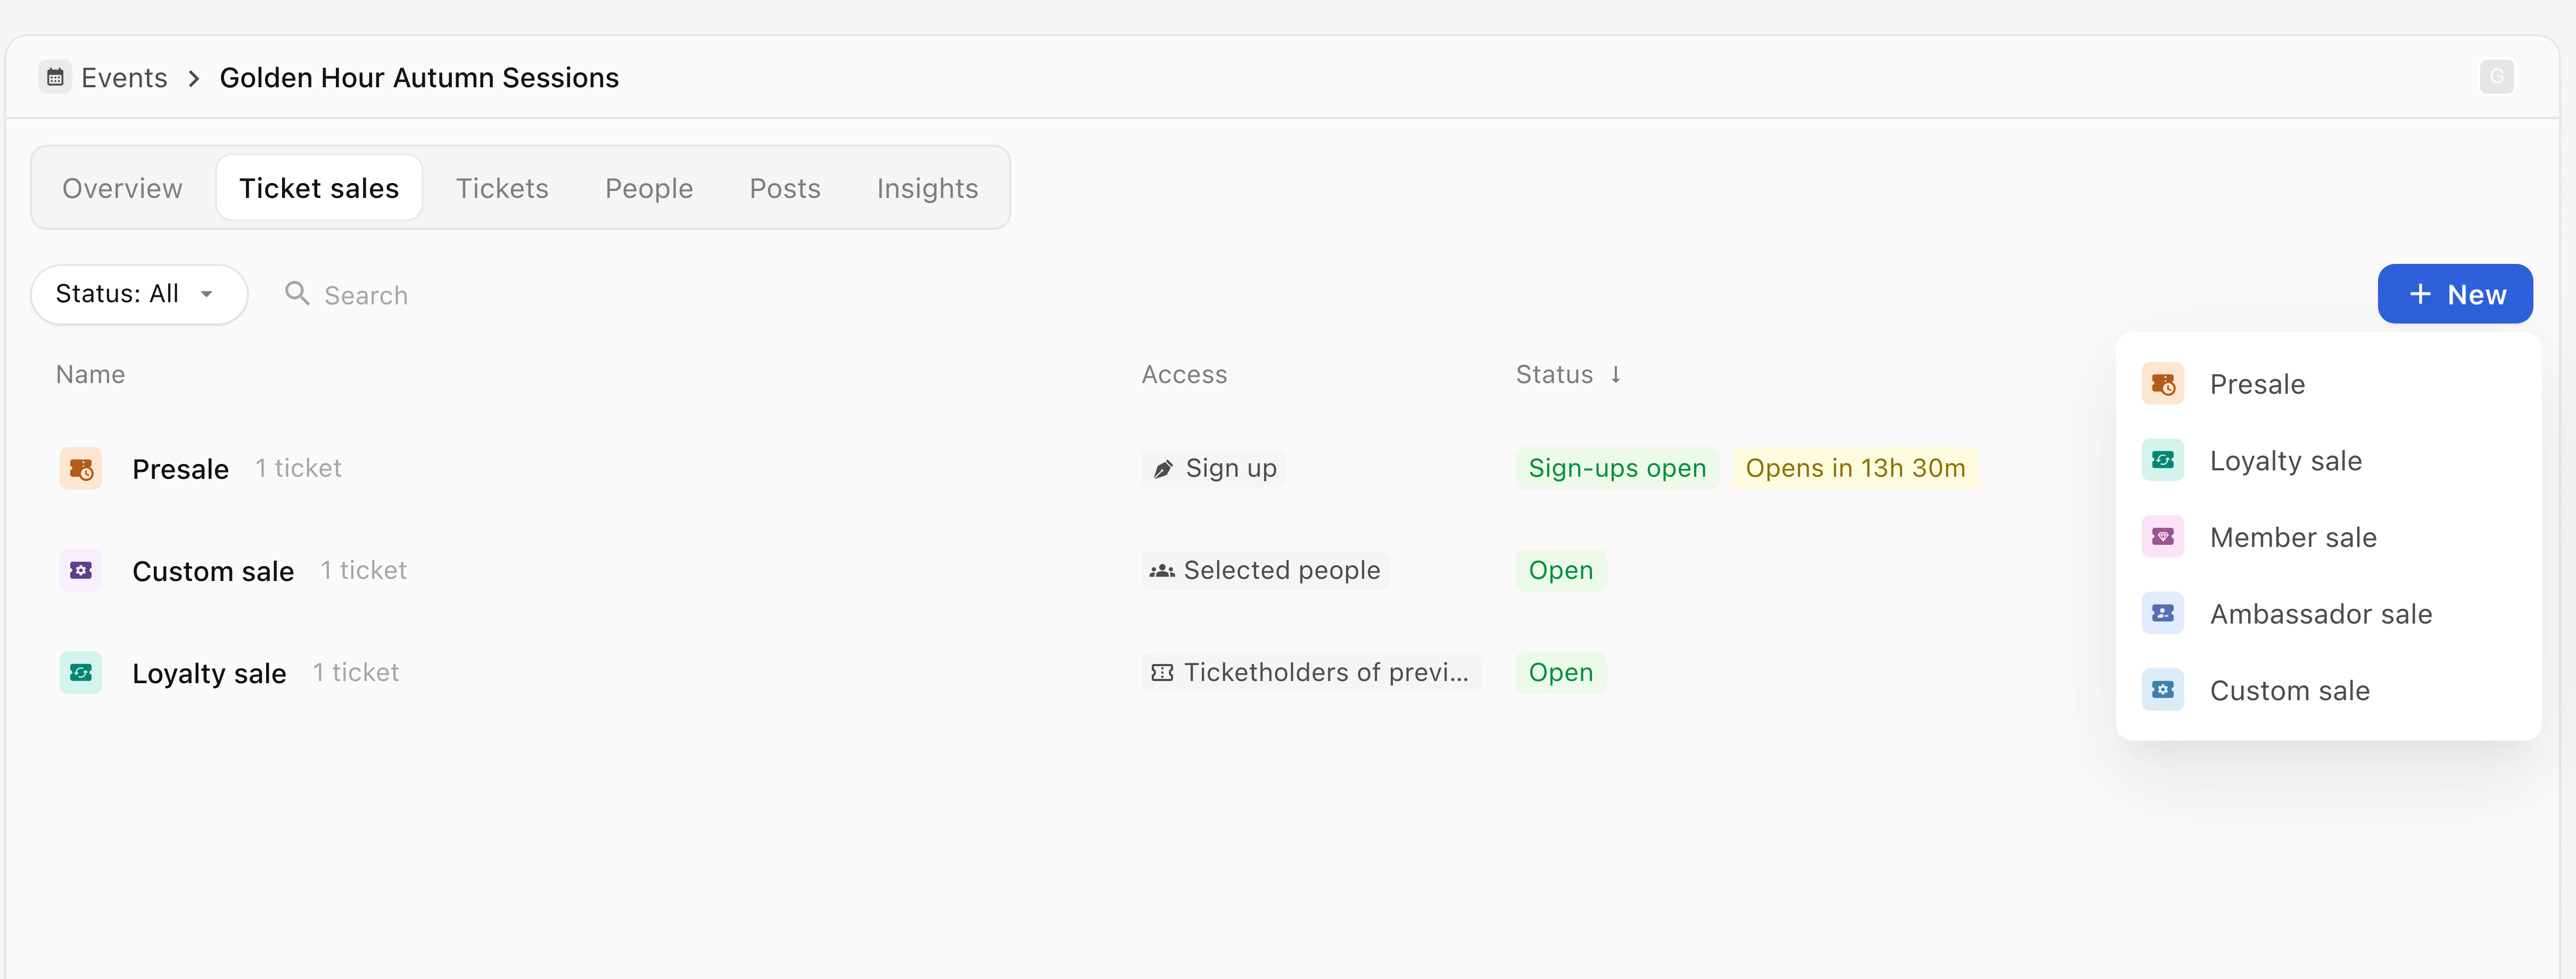
- In Access, open Select event… beside Ticketholder of....
- Use Search event, Recently selected, Coming up or Past events to find the source event and select it.
- Under Ticket types, keep All types or select the relevant ticket types.
- Enable Give access only to people who have checked in at the event. only if recorded attendance is required. Check the resulting selected-person count.
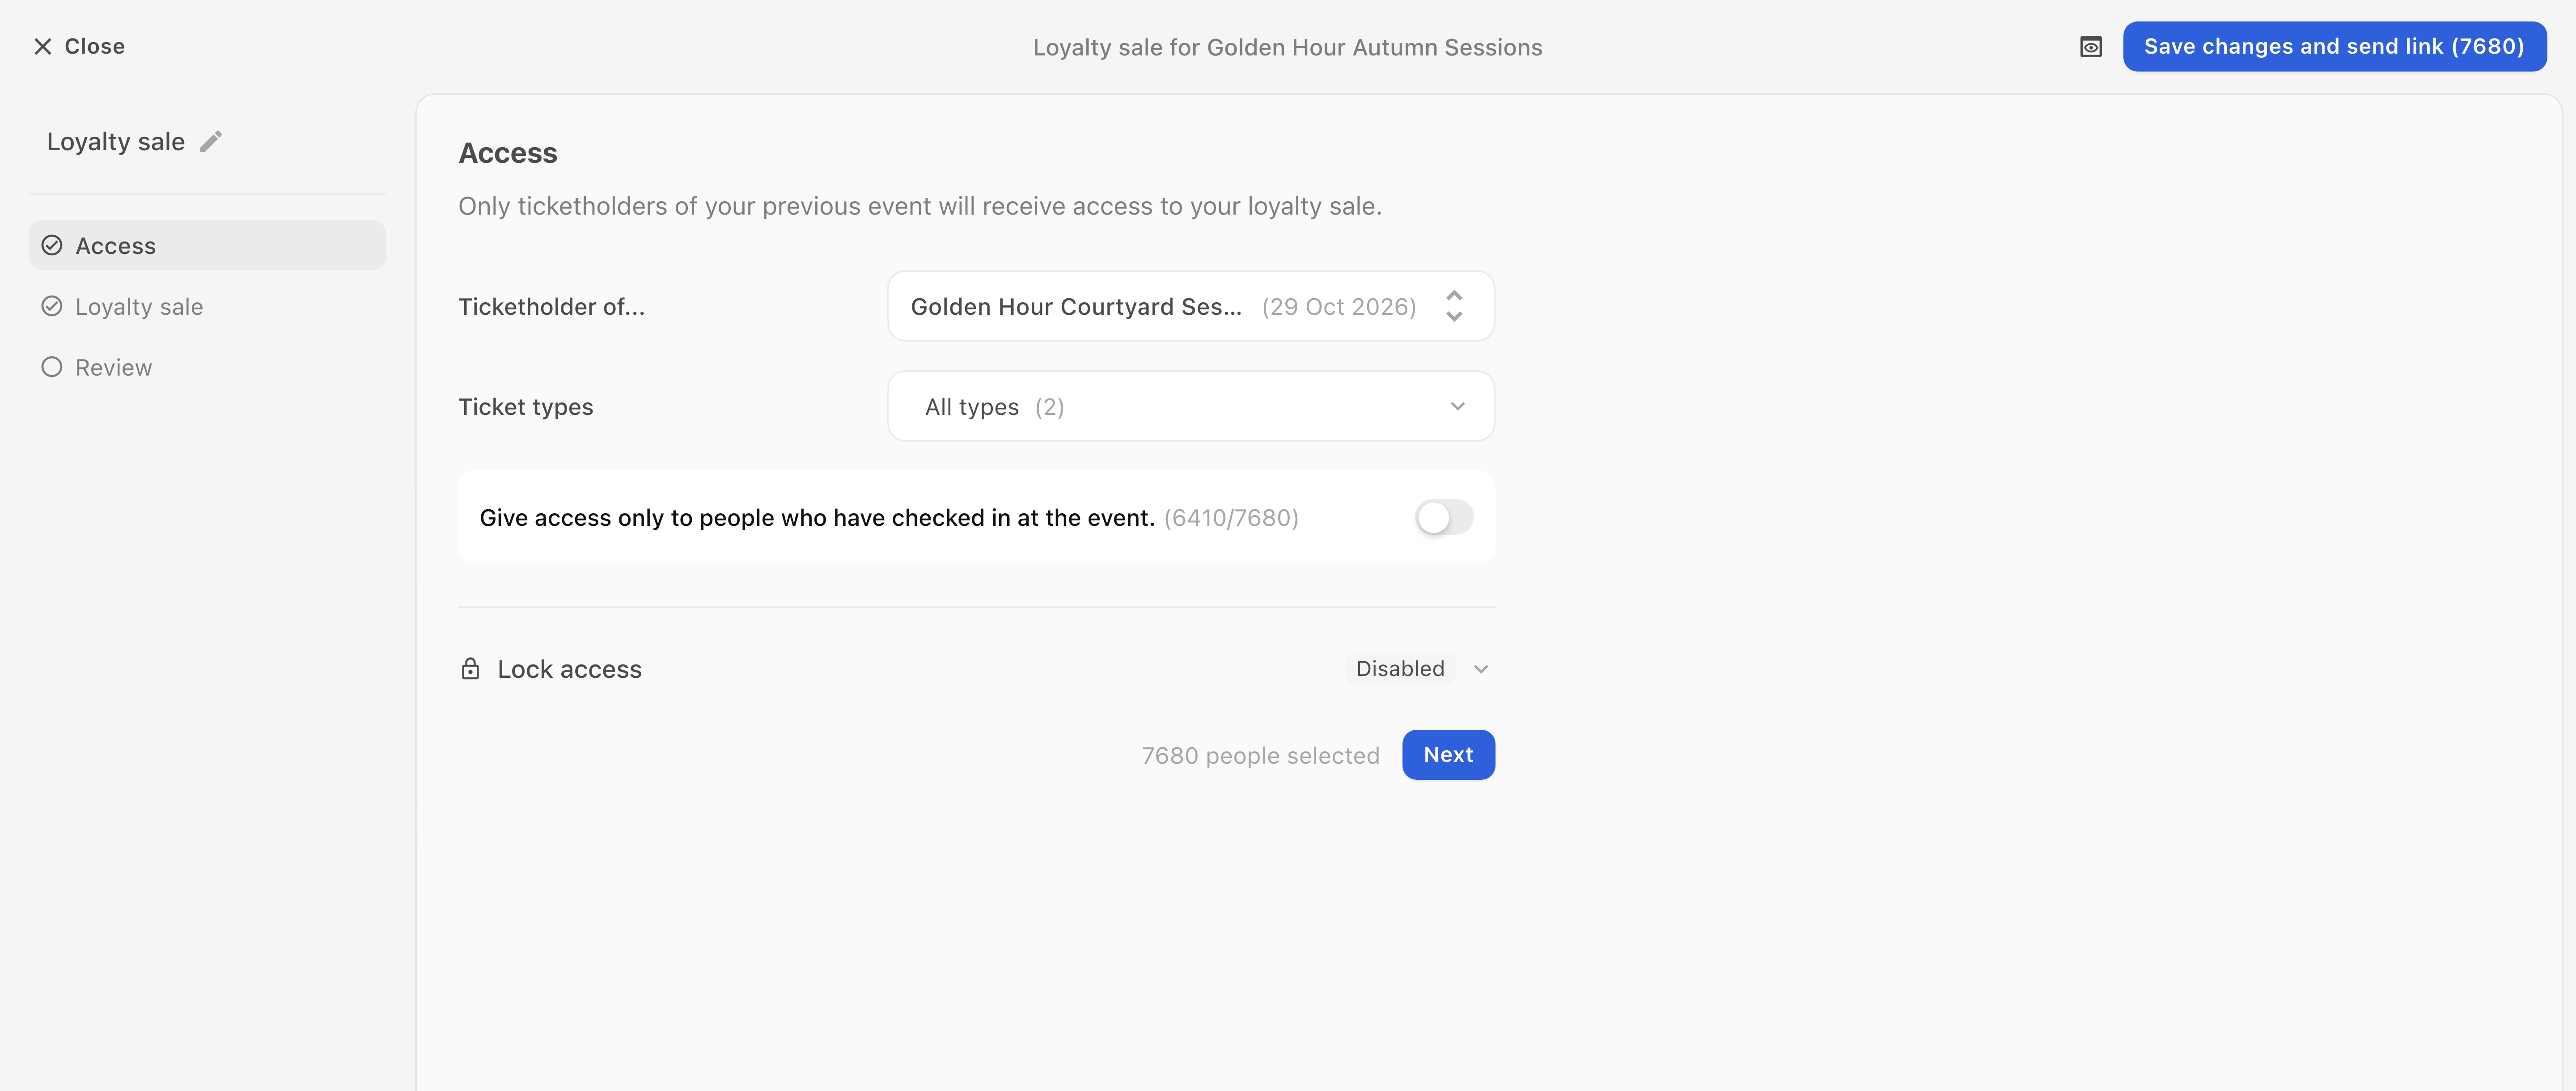
This saved sale editor’s Save changes and send link (7,680) action also sends the access link to those recipients; do not treat it as a save-only control.
- Open Lock access and check Require WhatsApp subscription for access. If enabled, eligible people must agree to WhatsApp updates about the event to unlock access. This is separate from sending them a message.
- Select Next to open Tickets.
Add tickets and review the schedule
- In Tickets, enter the Sale title.
- Use Add ticket to create a ticket or Select ticket to choose an existing ticket for the new event. Finish with Add ticket or Done.
- Check Personal plus ones and WhatsApp updates at checkout, then select Next.
- In Availability date, check Opens, Closes and Visible from. Review the suggested dates after choosing the source event; do not assume they match your intended sale.
- Select Next to open Messages.
- Choose Email and WhatsApp for sending access, then check When? and the eligible recipient counts.
- Open Reminder settings and check its channels and timing separately. Turn off both channels for each message you do not want to send.
- Select Next to open Review. Check Access, Tickets, Personal plus ones, Lock access and the timeline. Use the relevant Change control to correct a setting.
- Check the final button and message settings. Creating the sale activates the access rules and schedule. Enabled access messages and reminders follow their configured timing. A final button containing and send link and a recipient count also sends access messages to those recipients.
- Select Create sale when you are ready, or Save draft to keep an unfinished setup.
- On the saved sale, check Access for the source audience and the number of people with access. Check the timeline for its opening and closing dates.
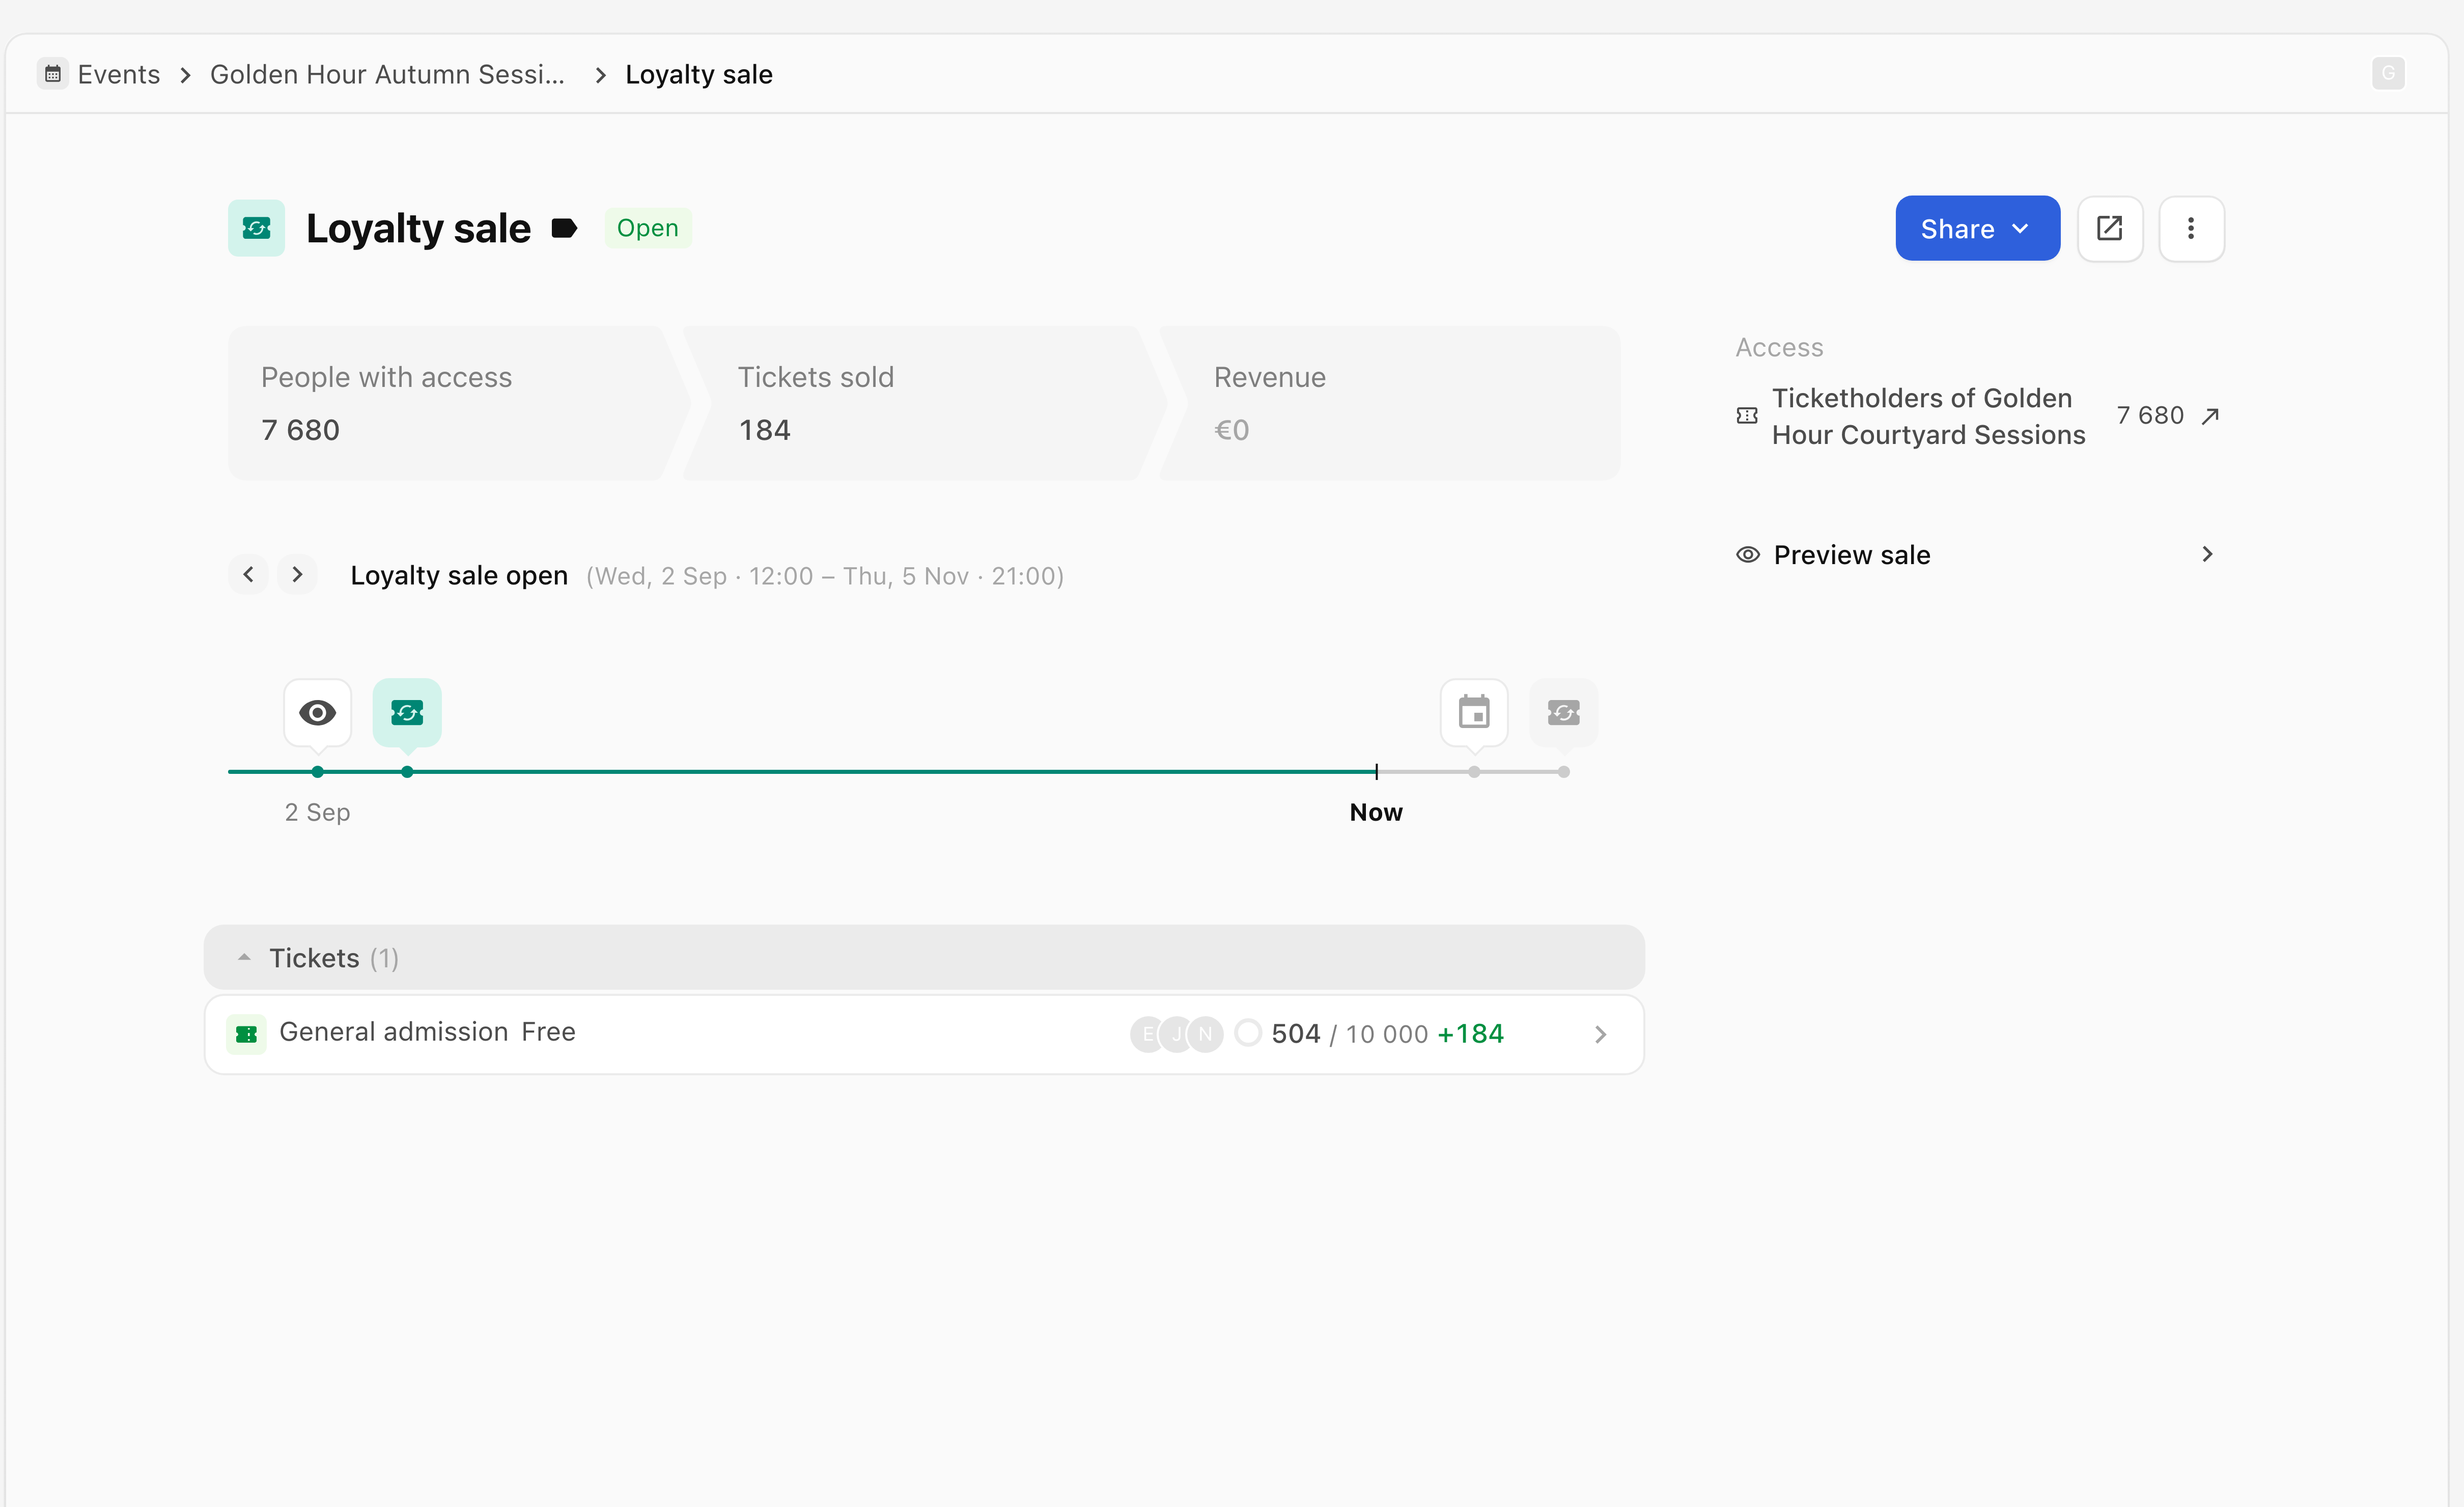
Send preview sends a message to the chosen preview recipients. A past ticket does not itself make someone eligible for WhatsApp delivery.
If the audience is missing or someone cannot buy
- The source event is missing: check that you have access to the organisation and its event audience.
- No people are selected: check Ticket types and the check-in switch. A check-in filter excludes people whose attendance is not recorded.
- An eligible person cannot buy: check the new sale's dates, ticket stock, Personal plus ones and any Lock access requirement.
For a provider event, Add event audience may be offered before its audience is ready:
- Select Add event audience if it is offered, then wait for the audience to finish loading.
- If it fails and Retry is offered, select Retry.
- Check that the source audience is available before continuing. Contact support if it remains unavailable.
Use Need more help? Message support below if these checks do not resolve it. Include the organisation, source event, new event, sale name and error shown. Keep personal ticket links and attendee details private.