Choose how people get ticket access
Compare ticket access options and set up a member sale for an existing group.
Use a ticket sale to decide which audience can obtain an event’s tickets and when. Choose the access route that matches your invitation: sign-ups, selected people, a member group or another eligible audience. The event and its ticket types remain separate from the sale’s access rules.
For example, you could collect sign-ups for a presale, give selected people access through a Custom sale, or offer a Member sale to an existing member group. Choosing a group for a sale does not add people to that group or subscribe them to updates. Start by comparing the options below, then open the chooser for your event.
Choose a ticket sale
| Choose | When to use it |
|---|---|
| Regular tickets | Offer tickets on the event page, subject to the sale dates and ticket availability. Sell tickets directly through BASH. |
| Presale | Collect sign-ups through a form, then make tickets available to those people. Set up a presale. |
| Custom sale | Give selected people access, or create an unlisted sale for anyone with its link. Create private ticket access. |
| Loyalty sale | Give ticket holders from another event access, with optional ticket-type and check-in filters. Set up a loyalty sale. |
| Member sale | Give a specific member group access to tickets. |
| Ambassador sale | Give ambassadors personal links to share with buyers. Set up an ambassador sale. |
You may know these as private shops, custom shops or loyalty shops. The dashboard now calls them ticket sales.
Open the chooser
You need an event and permission to manage its ticket sales. For ticketing setup, start with Sell tickets for your event.
- Open Events in your organisation dashboard and select the event.
- Open Ticket sales.
- Select New. If the event has no ticket sales yet, select Create ticket sale instead.
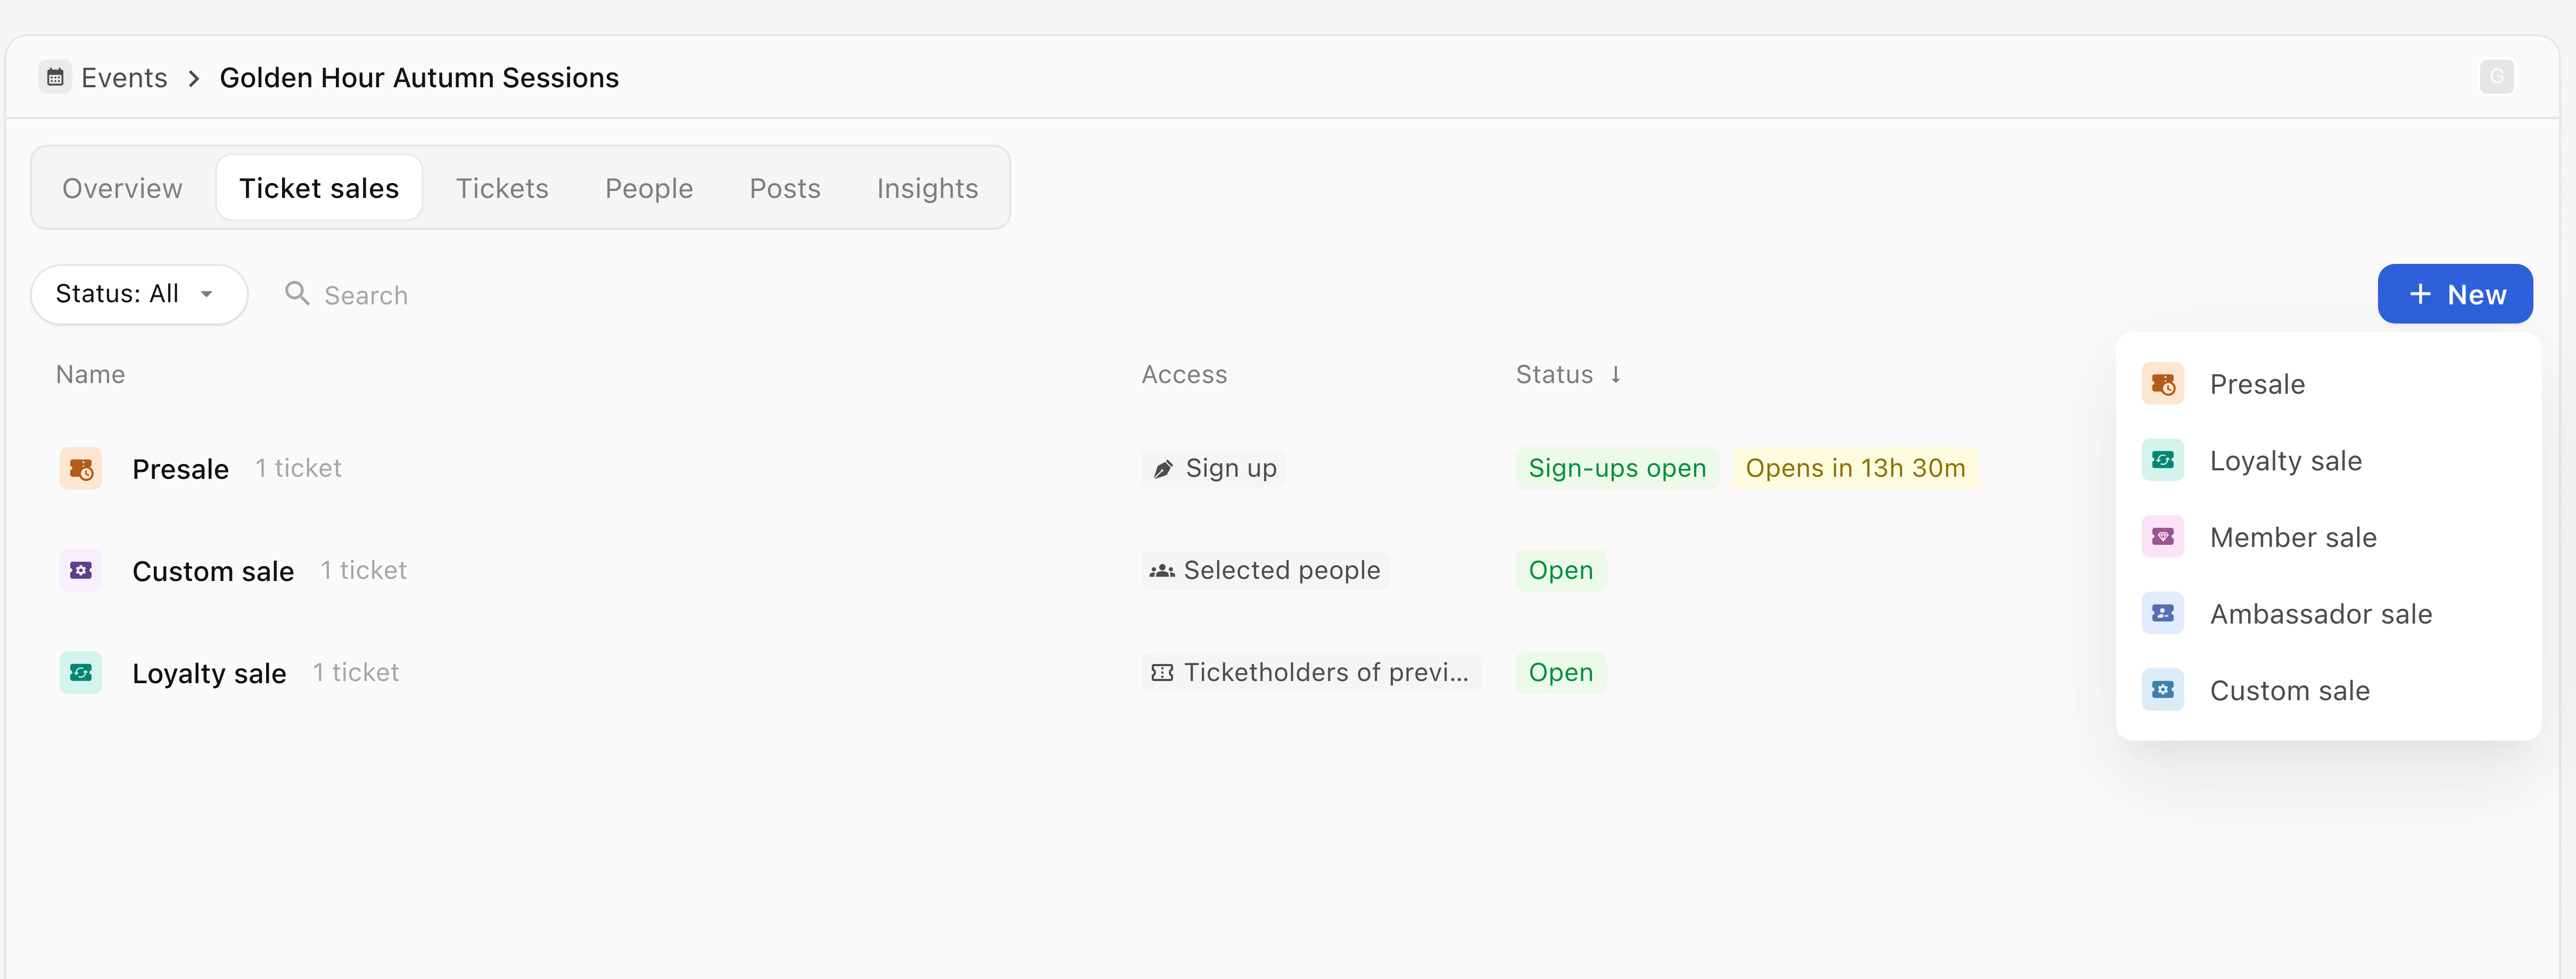
- Select the sale type. The event is already fixed by the page you opened; there is no second event selector in this menu.
Continue with the selected sale
The setup flow opens for that event and type. Selecting a type does not publish the sale. Follow the linked guide for the sale type you chose.
- Complete its access rules, tickets, dates and messages.
- Check Review before creating the sale.
Keep an unfinished setup
- Select Save draft.
- Check the saved draft that opens. You can also return to it from Ticket sales.
Set up a member sale
Use a member sale when an existing member group should be able to obtain tickets. Create the group first if it does not exist; see Memberships. Choosing a group for this sale does not add people to that group.
Choose the group and tickets
- In the chooser, select Member sale.
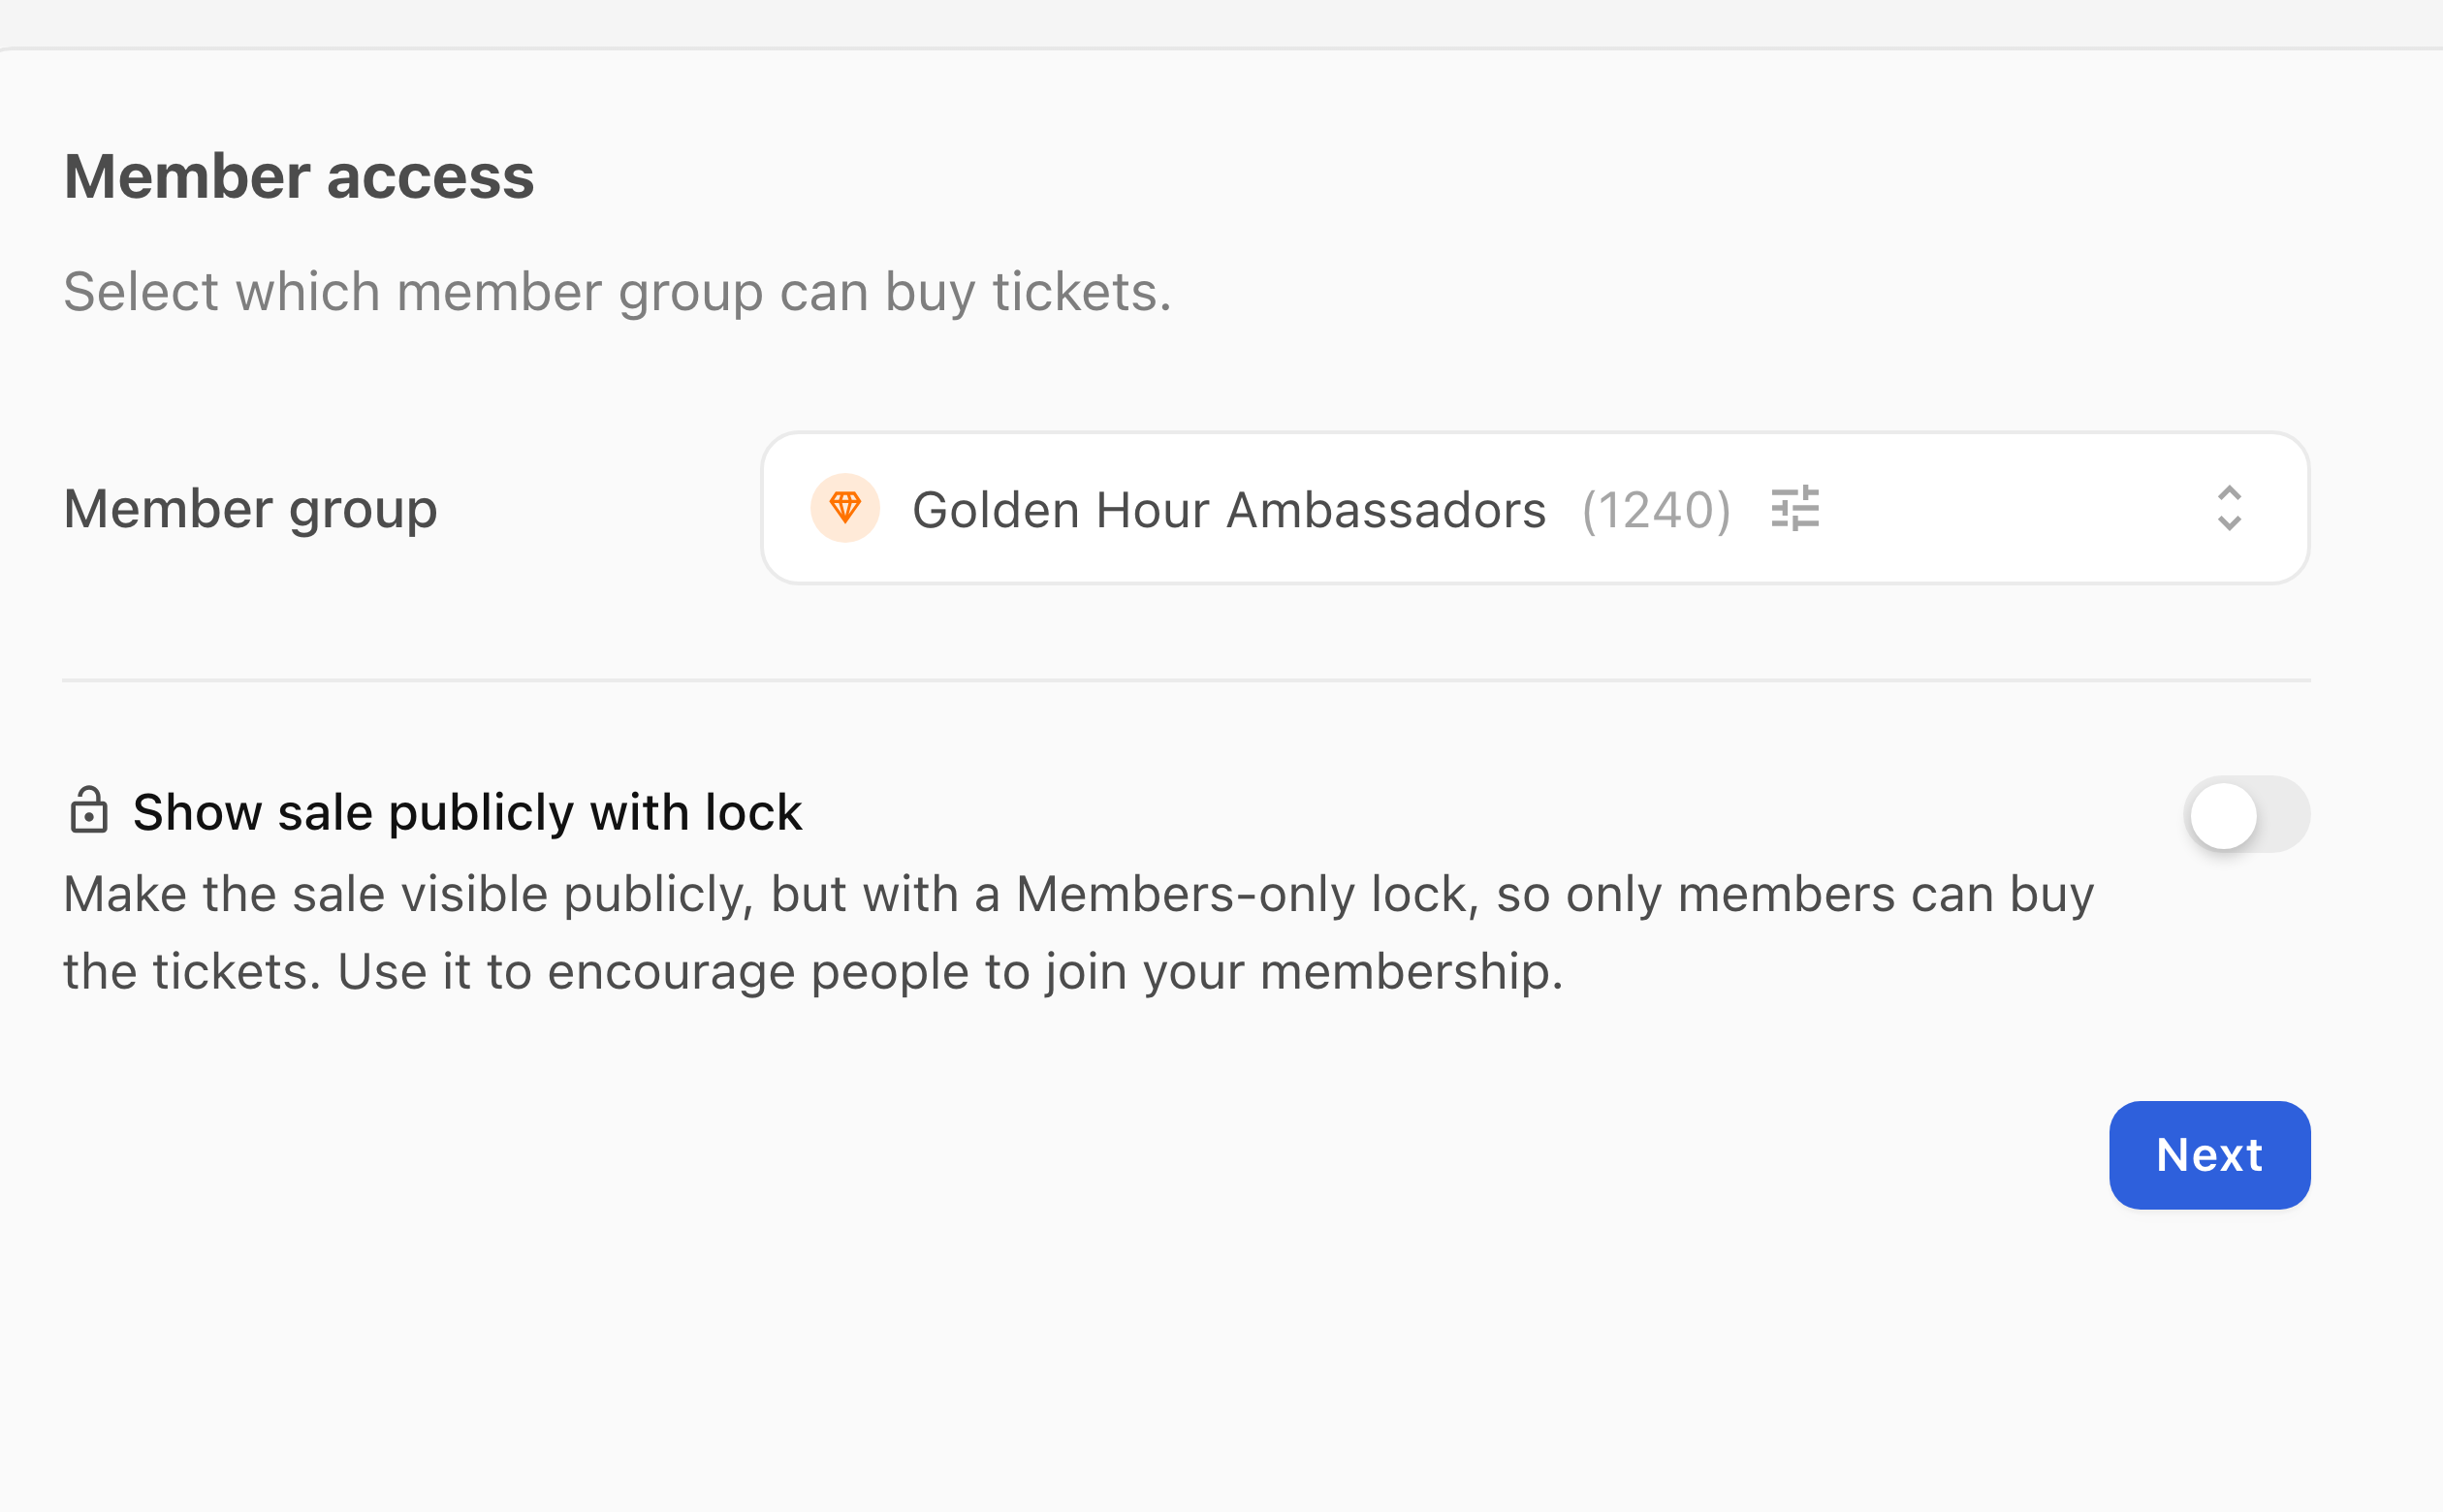
- Under Member access, select Select group and choose the intended member group.
- Decide whether to enable Show sale publicly with lock. This controls how the sale is displayed; membership still controls access. Select Next.
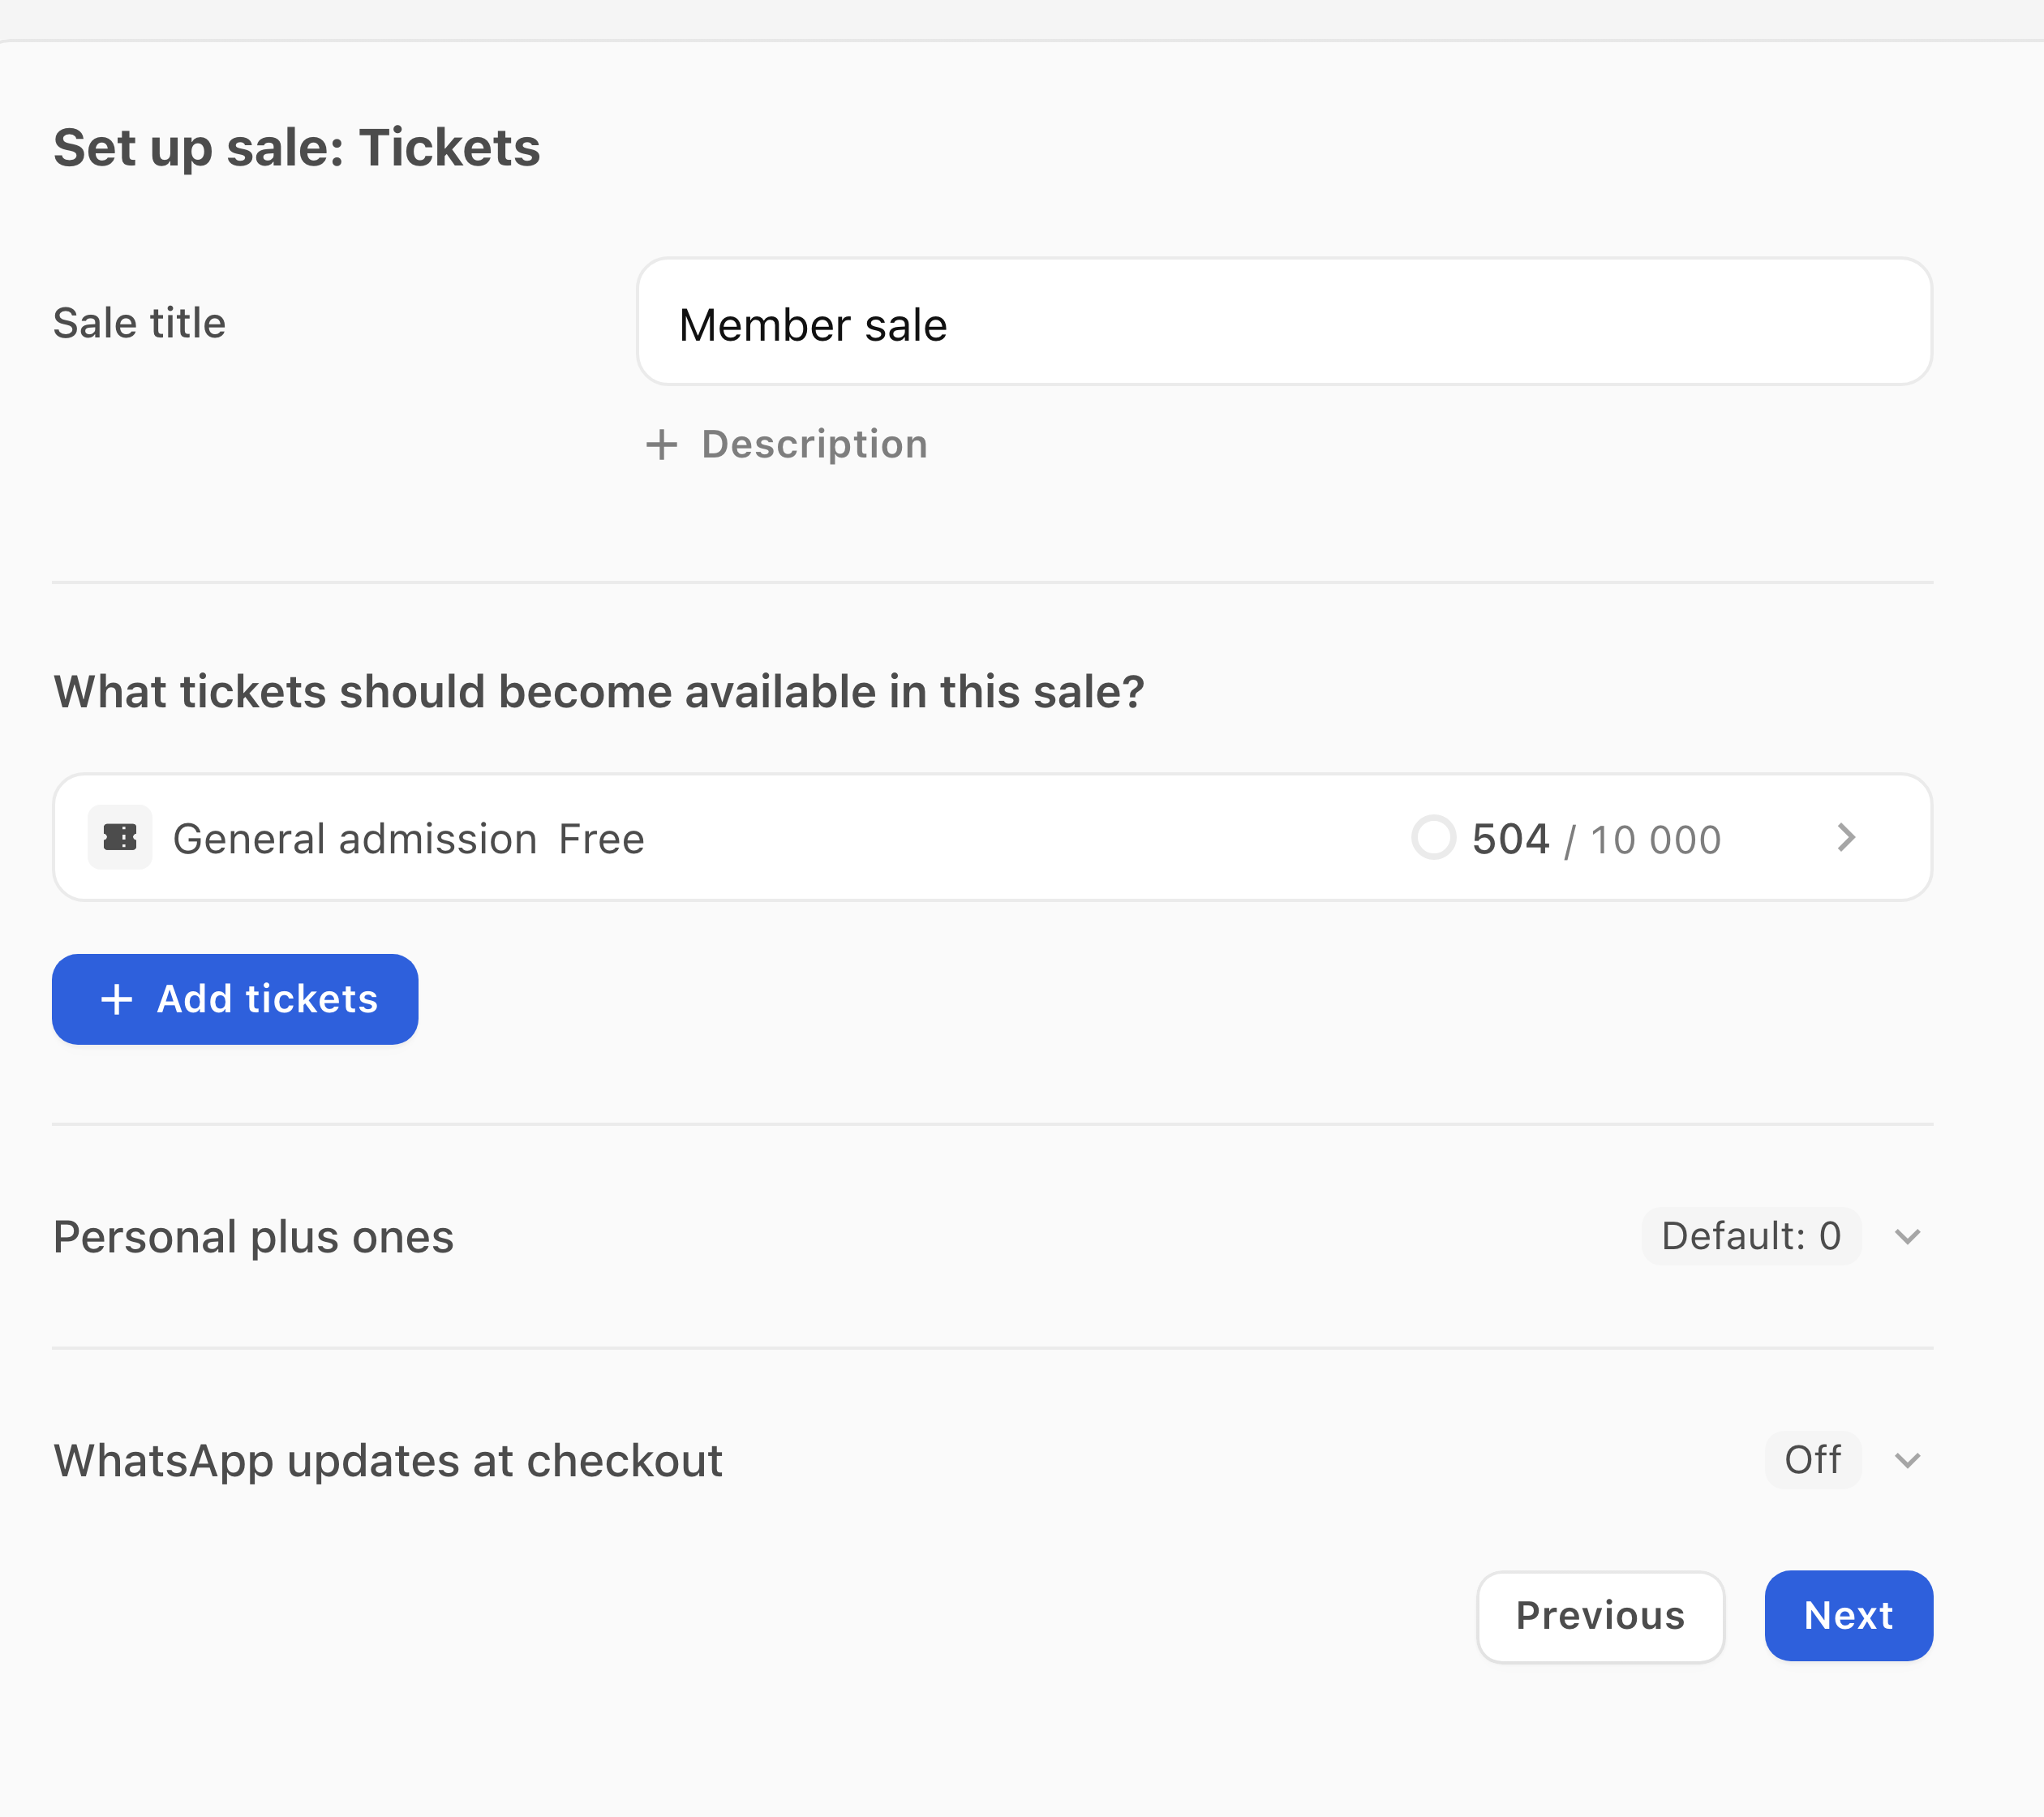
- In Set up sale: Tickets, enter the Sale title people should see.
- Select Add tickets, select the existing ticket types to include, then select Done. Check the selected list, Personal plus ones and WhatsApp updates at checkout, then select Next.
Set the dates and review messages
- In Availability dates, check Opens, Closes and Visible from, then select Next.
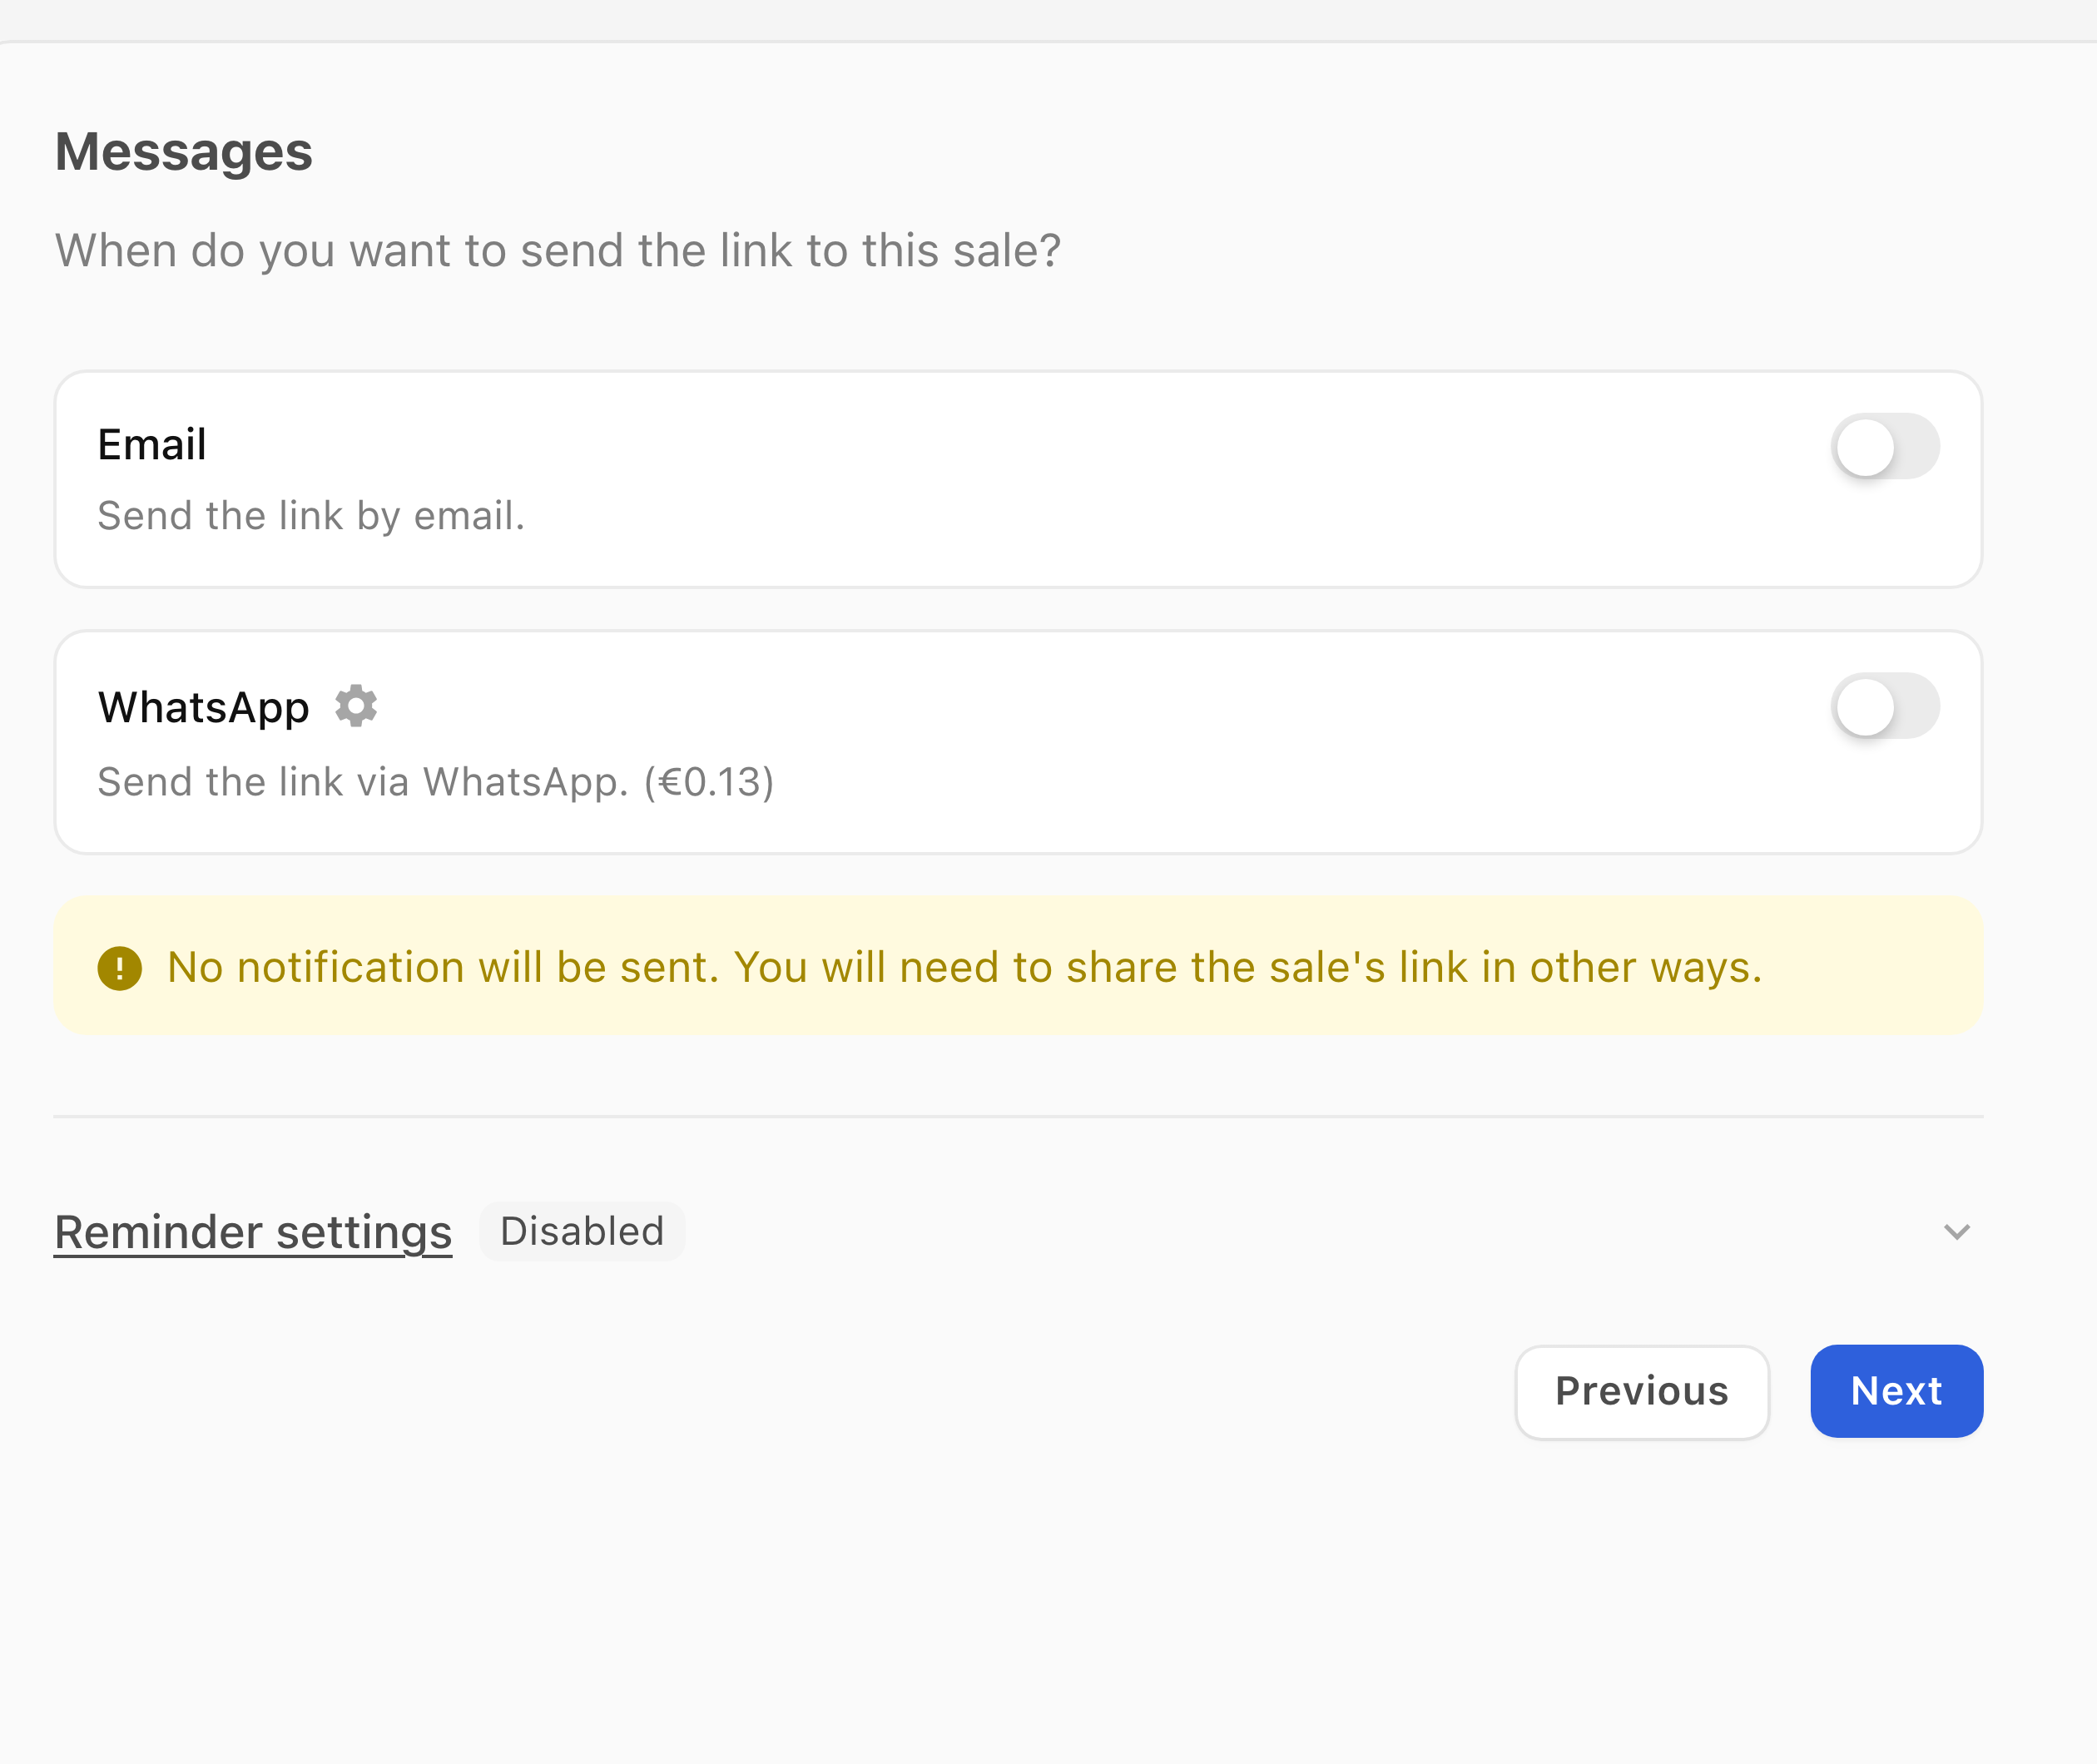
- In Messages, review Email and WhatsApp. Turn both off if you do not want to send a sale link through either channel.
- Review Reminder settings separately, then select Next.
Create and check the sale
- In Review, check the tickets, member group, personal plus ones and timeline. Use Change to correct a setting.
- With both message channels off, select Create sale when you are ready. If you enabled messages, review the final action and its recipient information before confirming.
- Check the saved sale and its Access group, then review the attendee preview before sharing it with members.
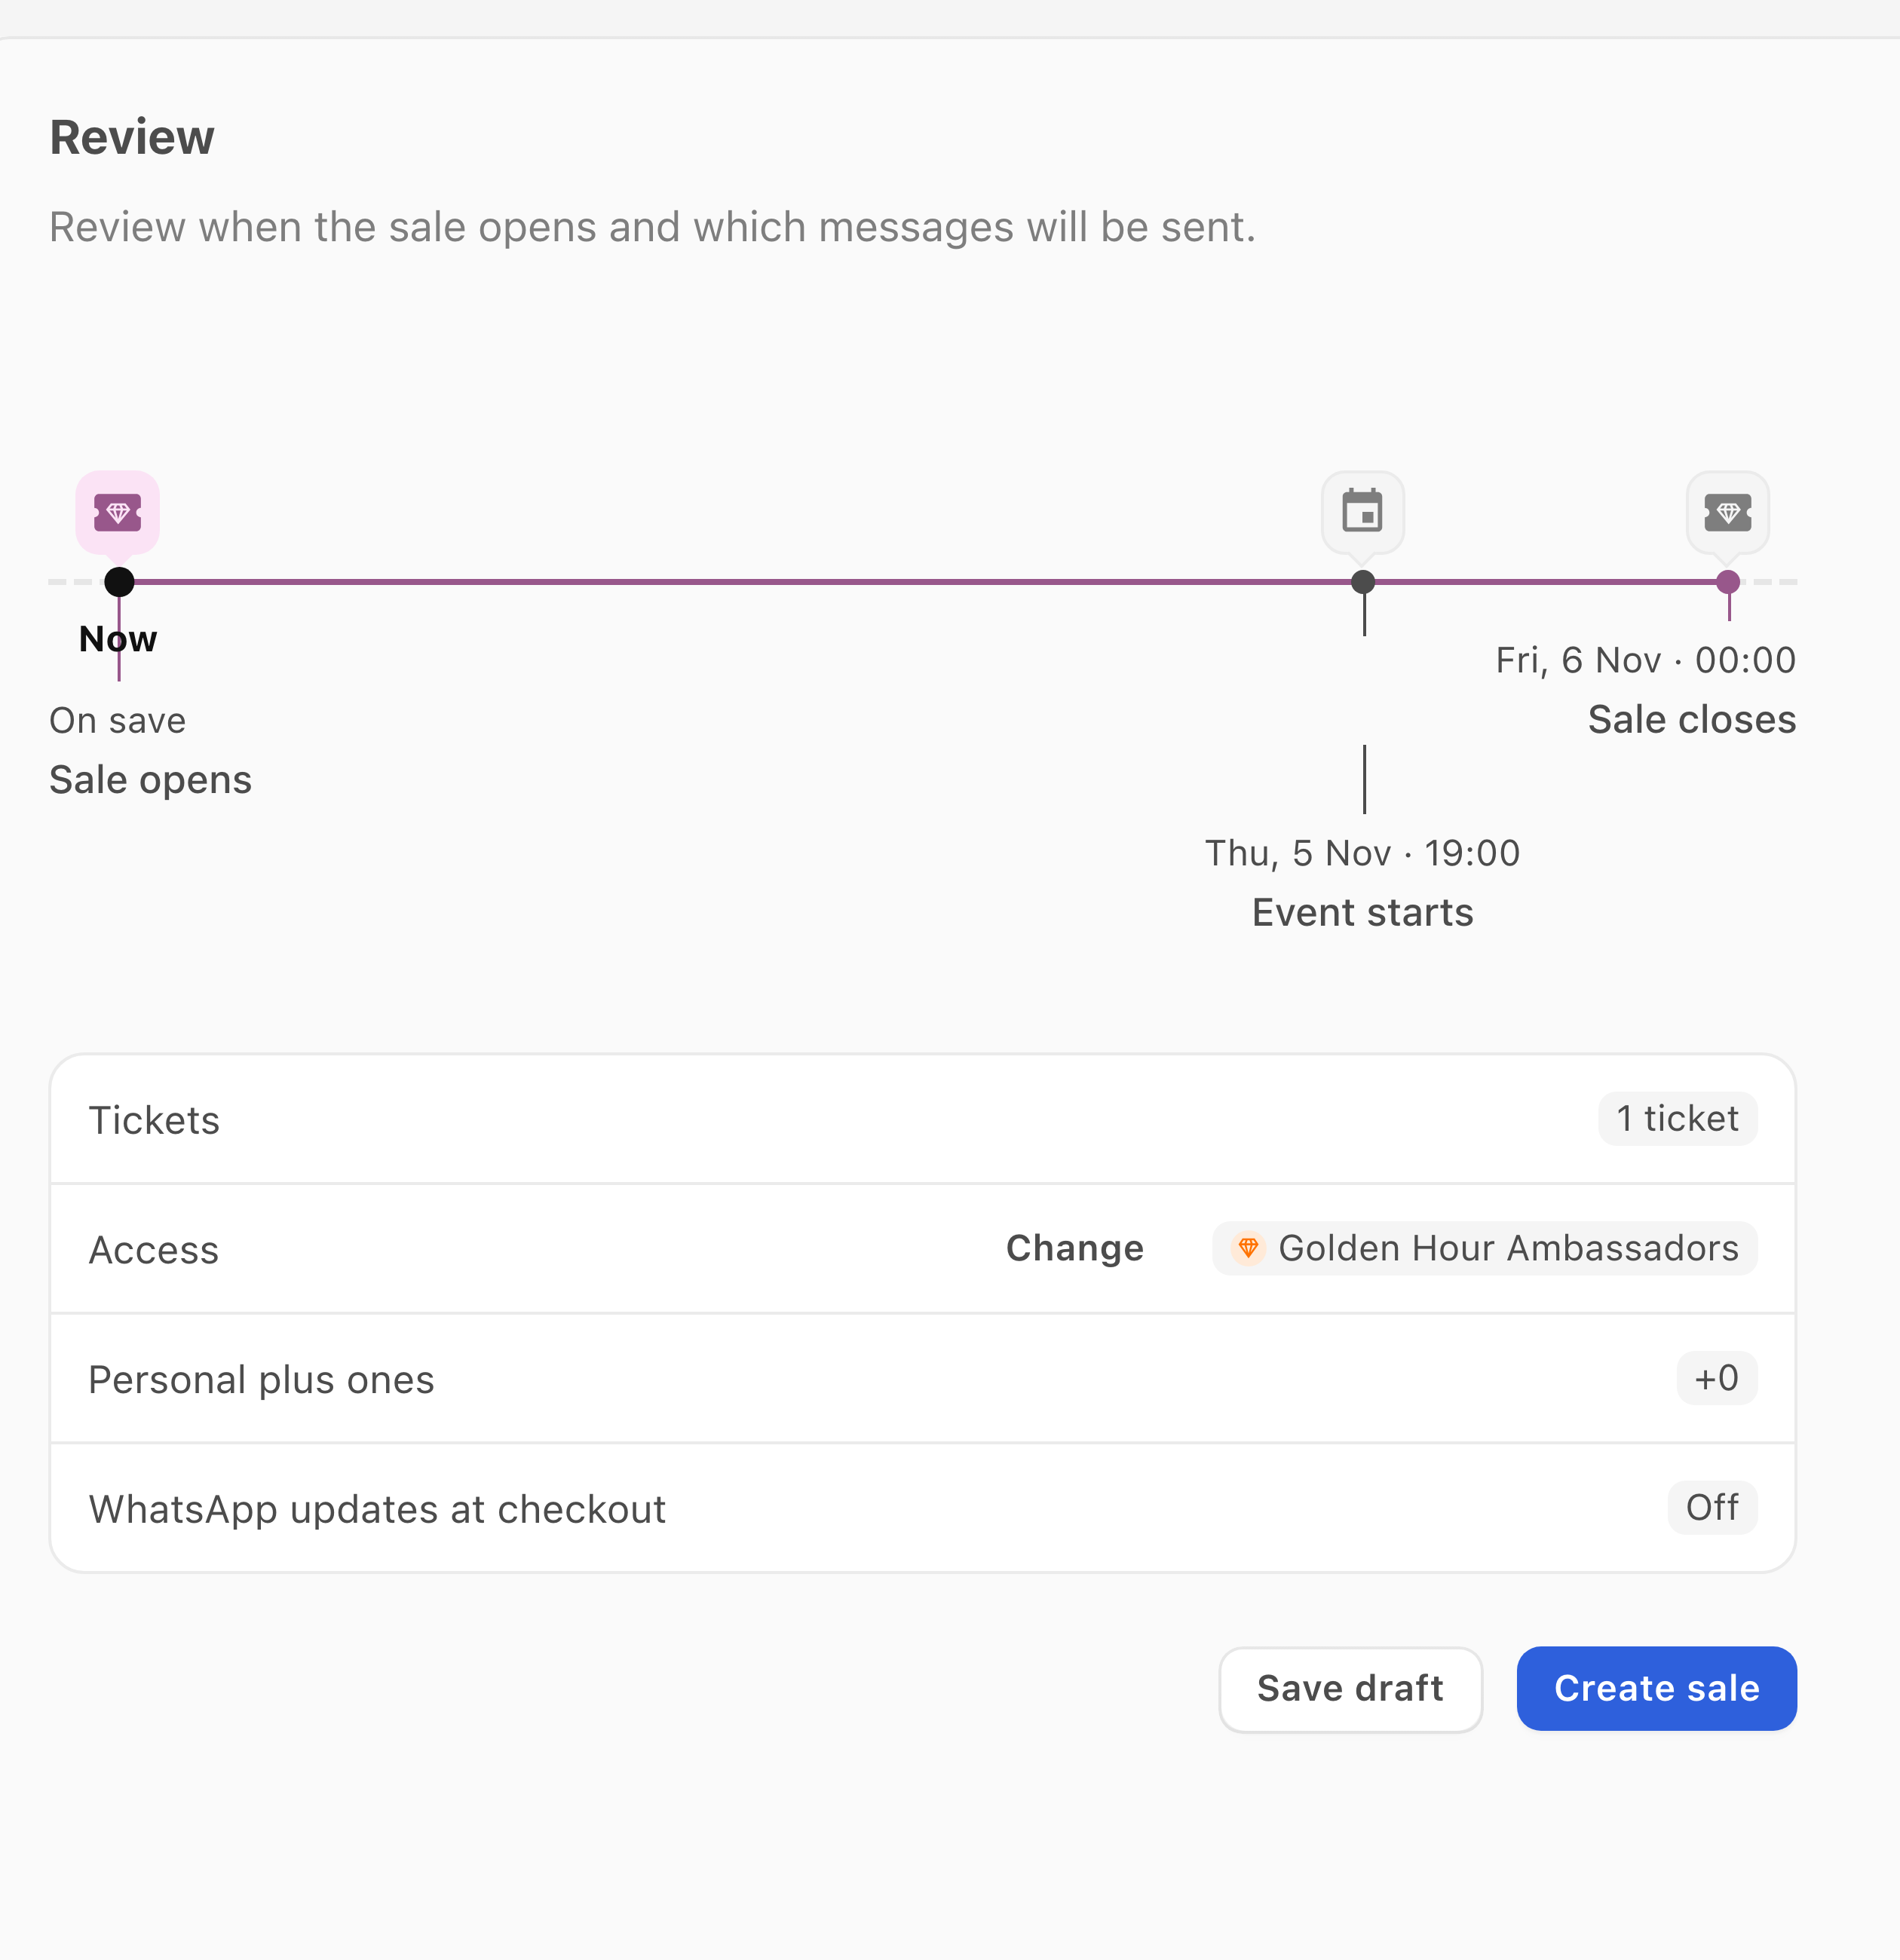
If Next is unavailable, check that you selected a group and at least one ticket. To stop before creation, use Save draft and return to the draft from Ticket sales.
If the event or creation control is missing
Check that you opened the organisation that manages the event. If you cannot manage its ticket sales, ask the organisation's administrator to check your access before continuing.
If you still cannot continue:
- Select Need more help? Message support below this article.
- Include the organisation, event and missing control or error shown.
- Select Open support message, then review and send the draft.
Keep private ticket links and attendee details out of the message.