Sell tickets directly through BASH
Offer community tickets when you cannot connect your provider, and plan how attendees will enter.
Connect your usual ticket provider to BASH first where it is supported. If your provider is not listed, contact support to request an integration and ask about the available route.
Selling directly through BASH is the fallback for the tickets you want to offer your community when a provider connection is not possible. For example, you could offer a community ticket allocation this way while keeping the wider event ticketing with your usual provider.
Plan how people will enter
Agree the admission arrangements before offering tickets:
- Your provider handles entry: ask which attendee data it can import and how it will issue or recognise admission credentials. BASH can export attendee data, but its current CSV does not include transferable ticket barcodes. Import compatibility and ticket issuing depend on the receiving provider.
- BASH handles these tickets at the door: use the BASH mobile app to scan BASH-issued tickets, or use manual check-in in the dashboard. See Check in attendees at your event.
If the provider cannot accept the export, arrange BASH check-in for this allocation before sending attendees their entry instructions. Ask support if the route is unclear; do not assume the same ticket can be scanned by both systems.
How the tickets are made available
When selling directly through BASH, create tickets in the event’s Tickets catalogue, then add them to a sale so attendees can obtain them. Creating an unassigned ticket does not put it on the attendee page.
Before you start
You need permission to manage the event’s ticketing and Sell directly through BASH selected in its ticketing setup. See Choose your ticketing setup.
Free tickets can be created before payouts are set up. If Price is disabled and Add payout details to charge for tickets appears, complete payout setup before charging attendees. That link opens Settings → Ticketing → Sell directly through BASH, where Set up payouts starts the payment-account setup.
Add your tickets
- Open the event and select Tickets.
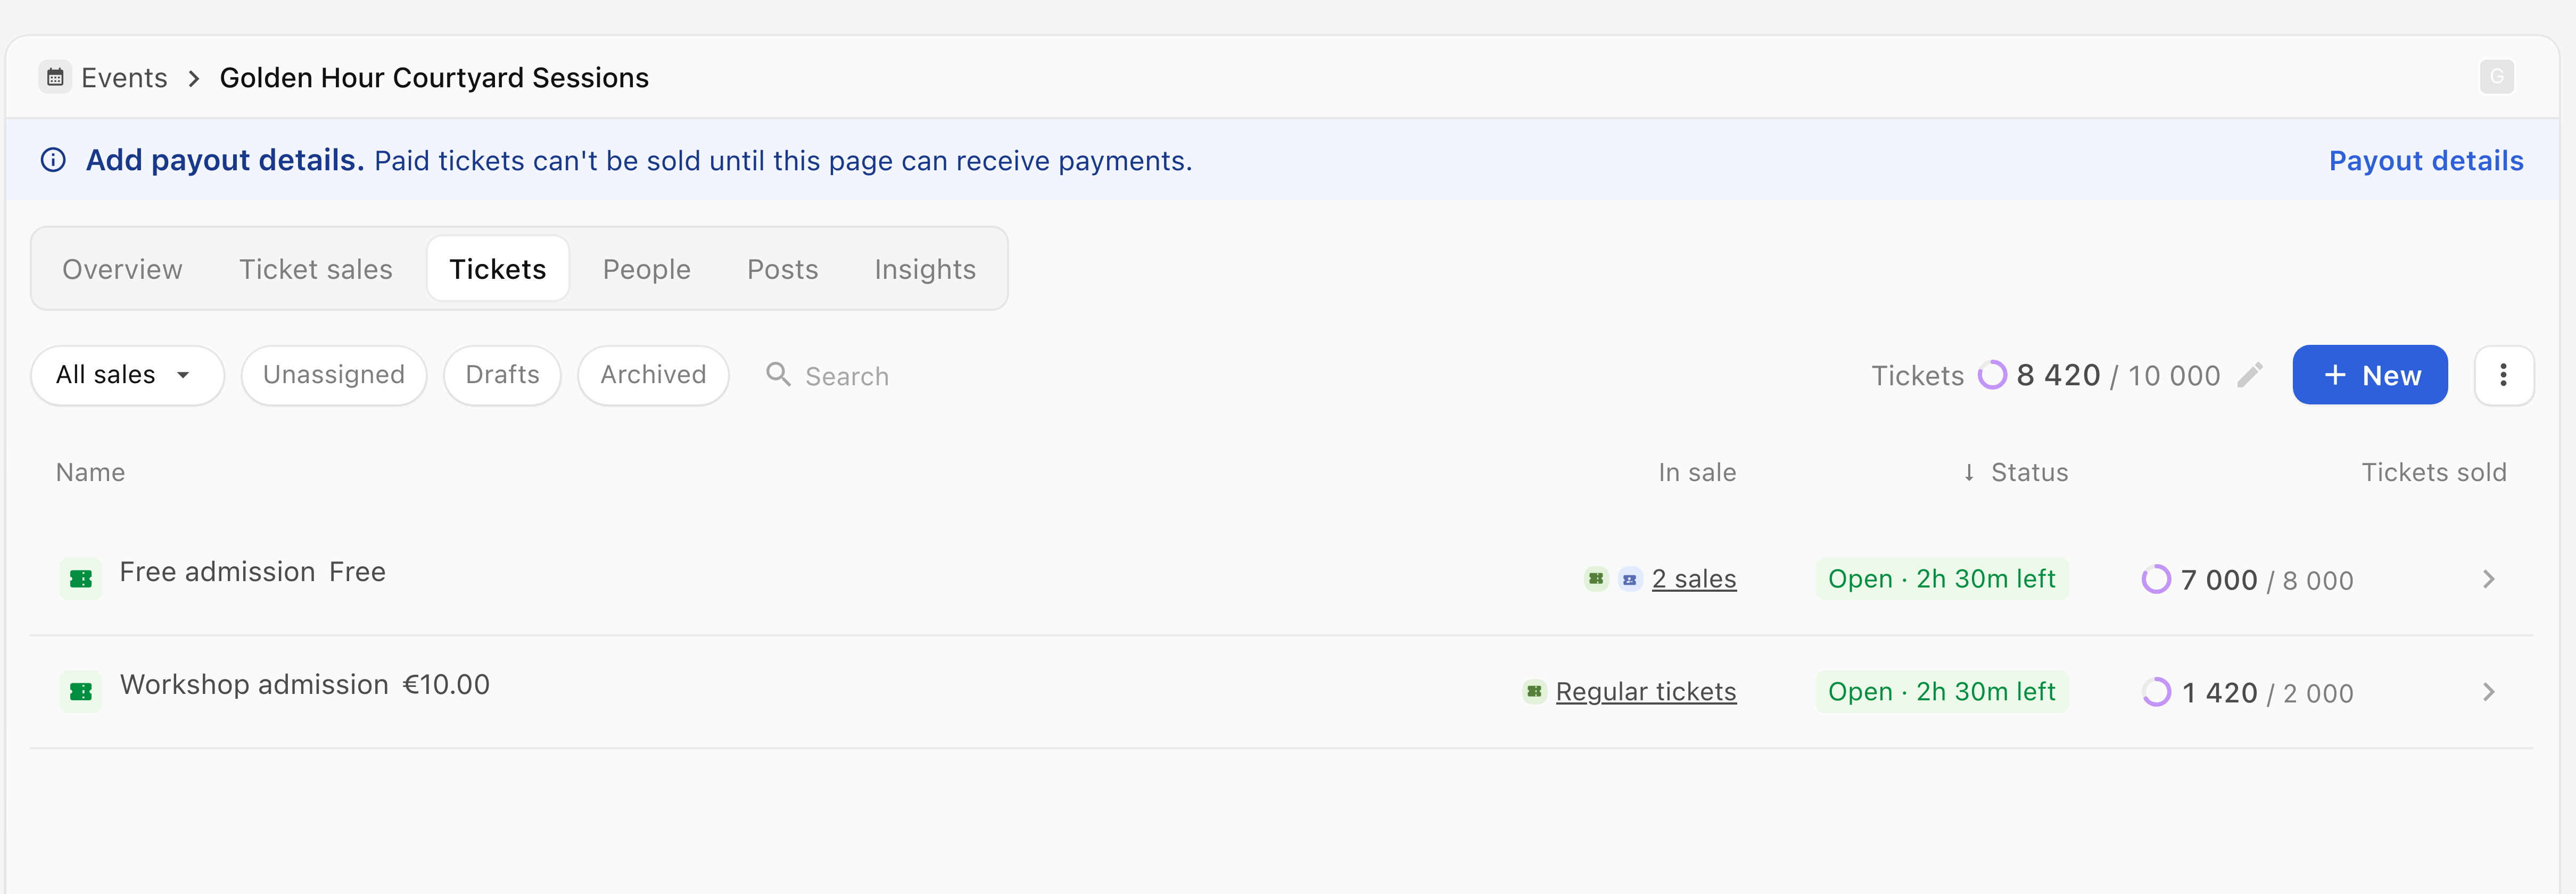
- Select New to open New ticket.
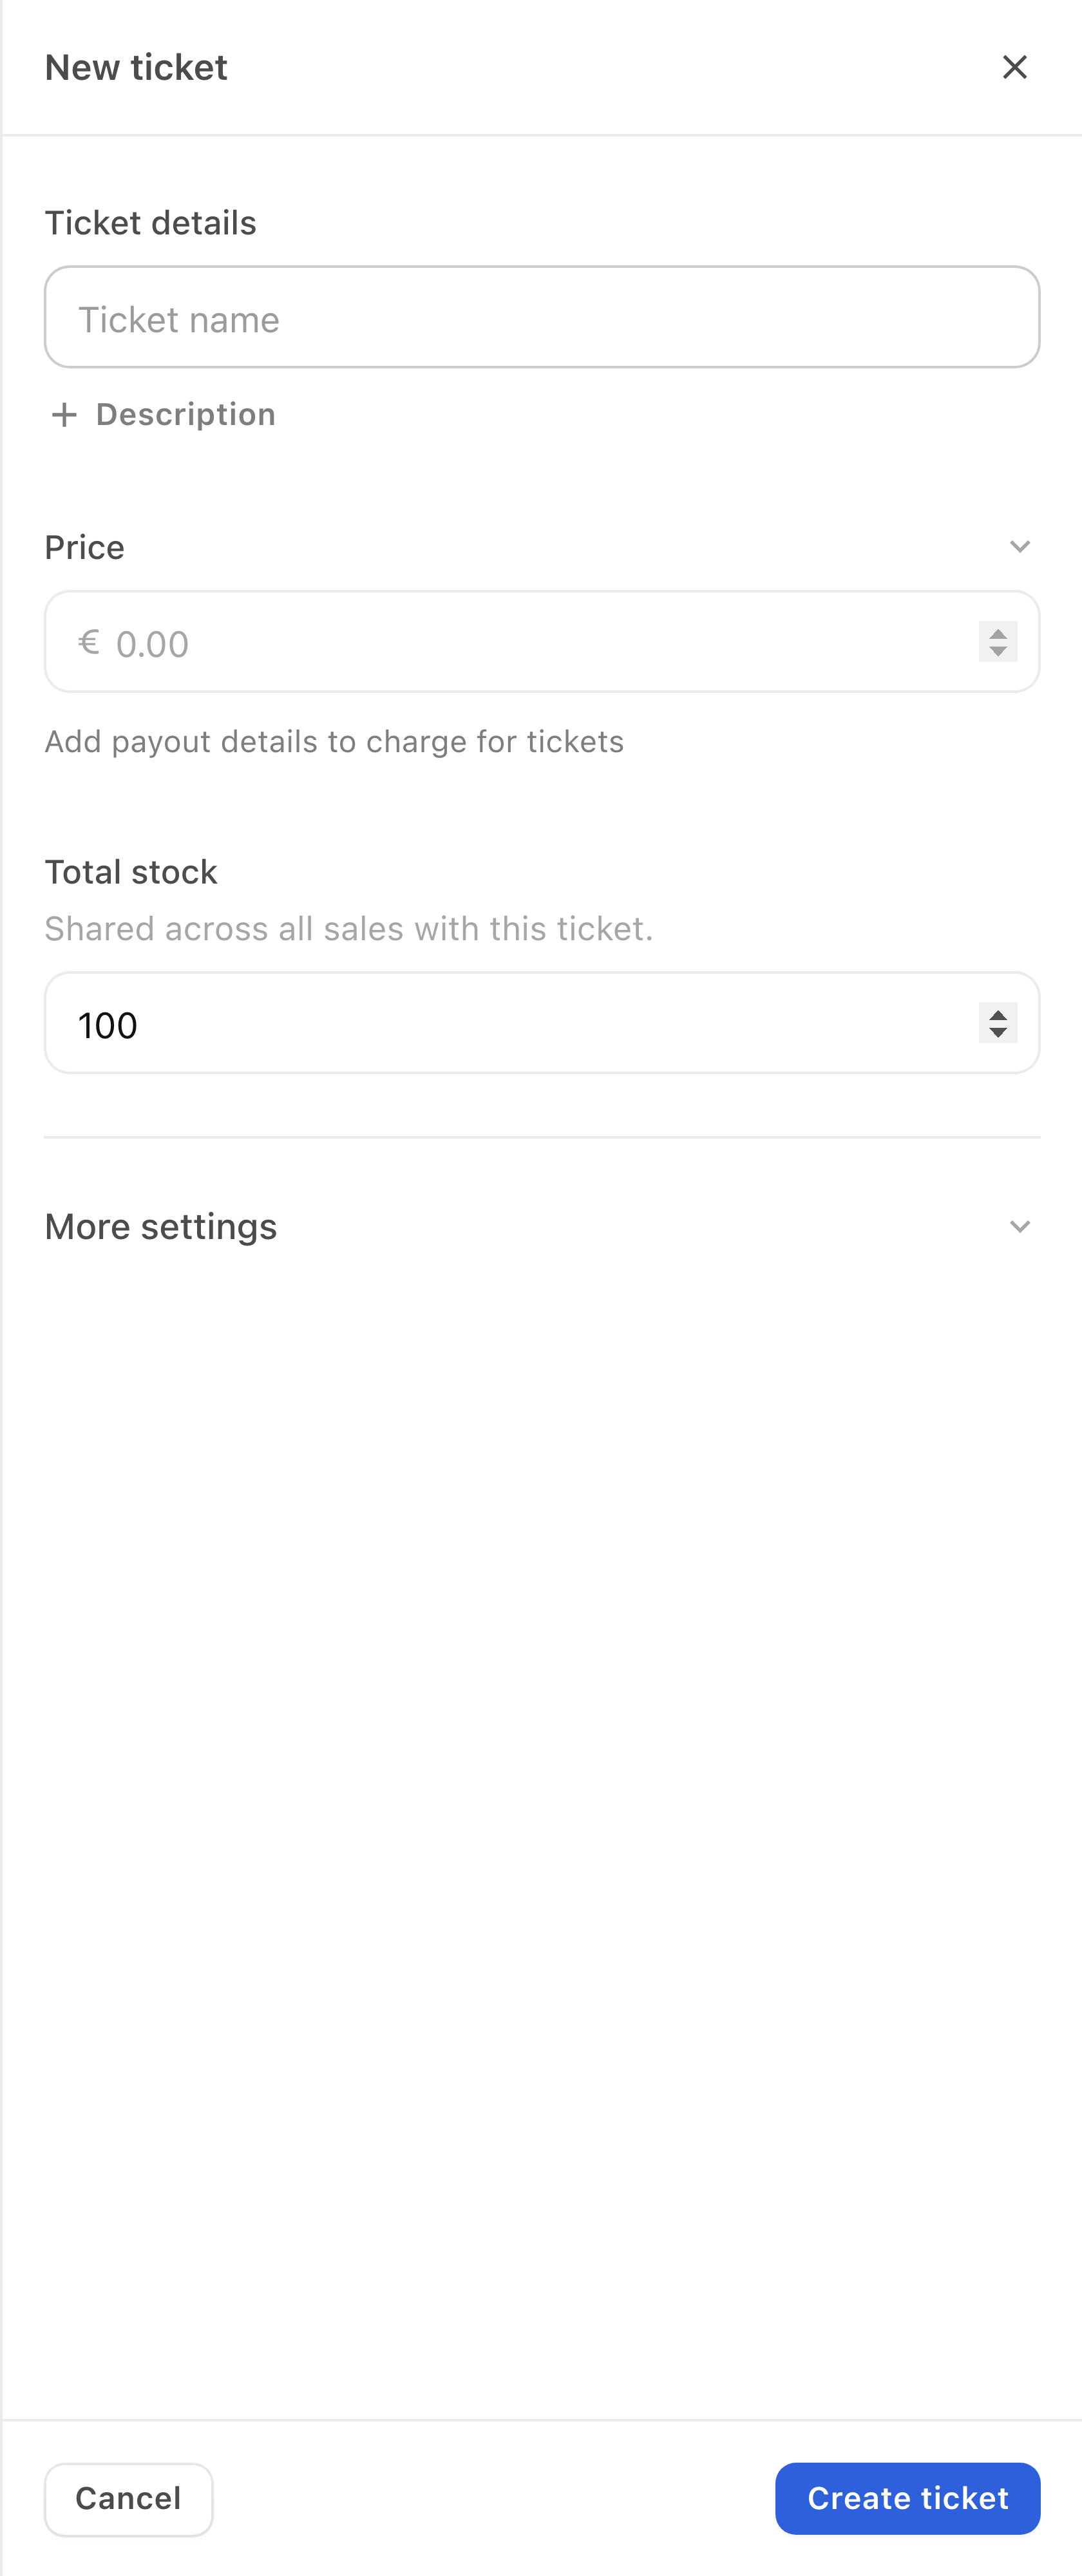
-
Enter Ticket name and Total stock. Stock is shared across all sales that use this ticket.
-
Set Price if paid tickets are available. Leave it at zero for a free ticket.
-
Open More settings if you need Ticket dates, Ticket-specific questions, Require approval, Only verified attendees, Ticket type, Group tickets or Max. tickets per person.
-
Select Create ticket.
The drawer closes and the ticket appears in the catalogue with its price and stock. If it shows Add to sale, it has been saved without a sale. You can find tickets without a sale under Unassigned.
Add tickets while creating an event
When adding a ticket during event creation, the drawer’s action is Add ticket and the message says Created when saving the event.
- Select Add ticket to add it to the event’s working copy.
- Continue to Sales dates and check Opens. If it is On save, regular sales open when the event is saved.
- Continue to Review and check the event and tickets.
- Select Create event to save them.
Offer a ticket on the event page
Adding a ticket to Regular tickets offers it on the event page when its sale dates allow purchases.
- In Tickets, select Add to sale beside the unassigned ticket.
- Open Sale and choose Regular tickets.
- Review the list, then select Add to regular tickets.
- Read the confirmation, then select Save and add.
The ticket’s In sale column now shows Regular tickets.
Check the attendee page
- Open the event’s Overview and select Open, shown as an arrow leaving a square.
- If you already hold a ticket, select Get more tickets.
- Check the intended ticket and its availability on the attendee page.
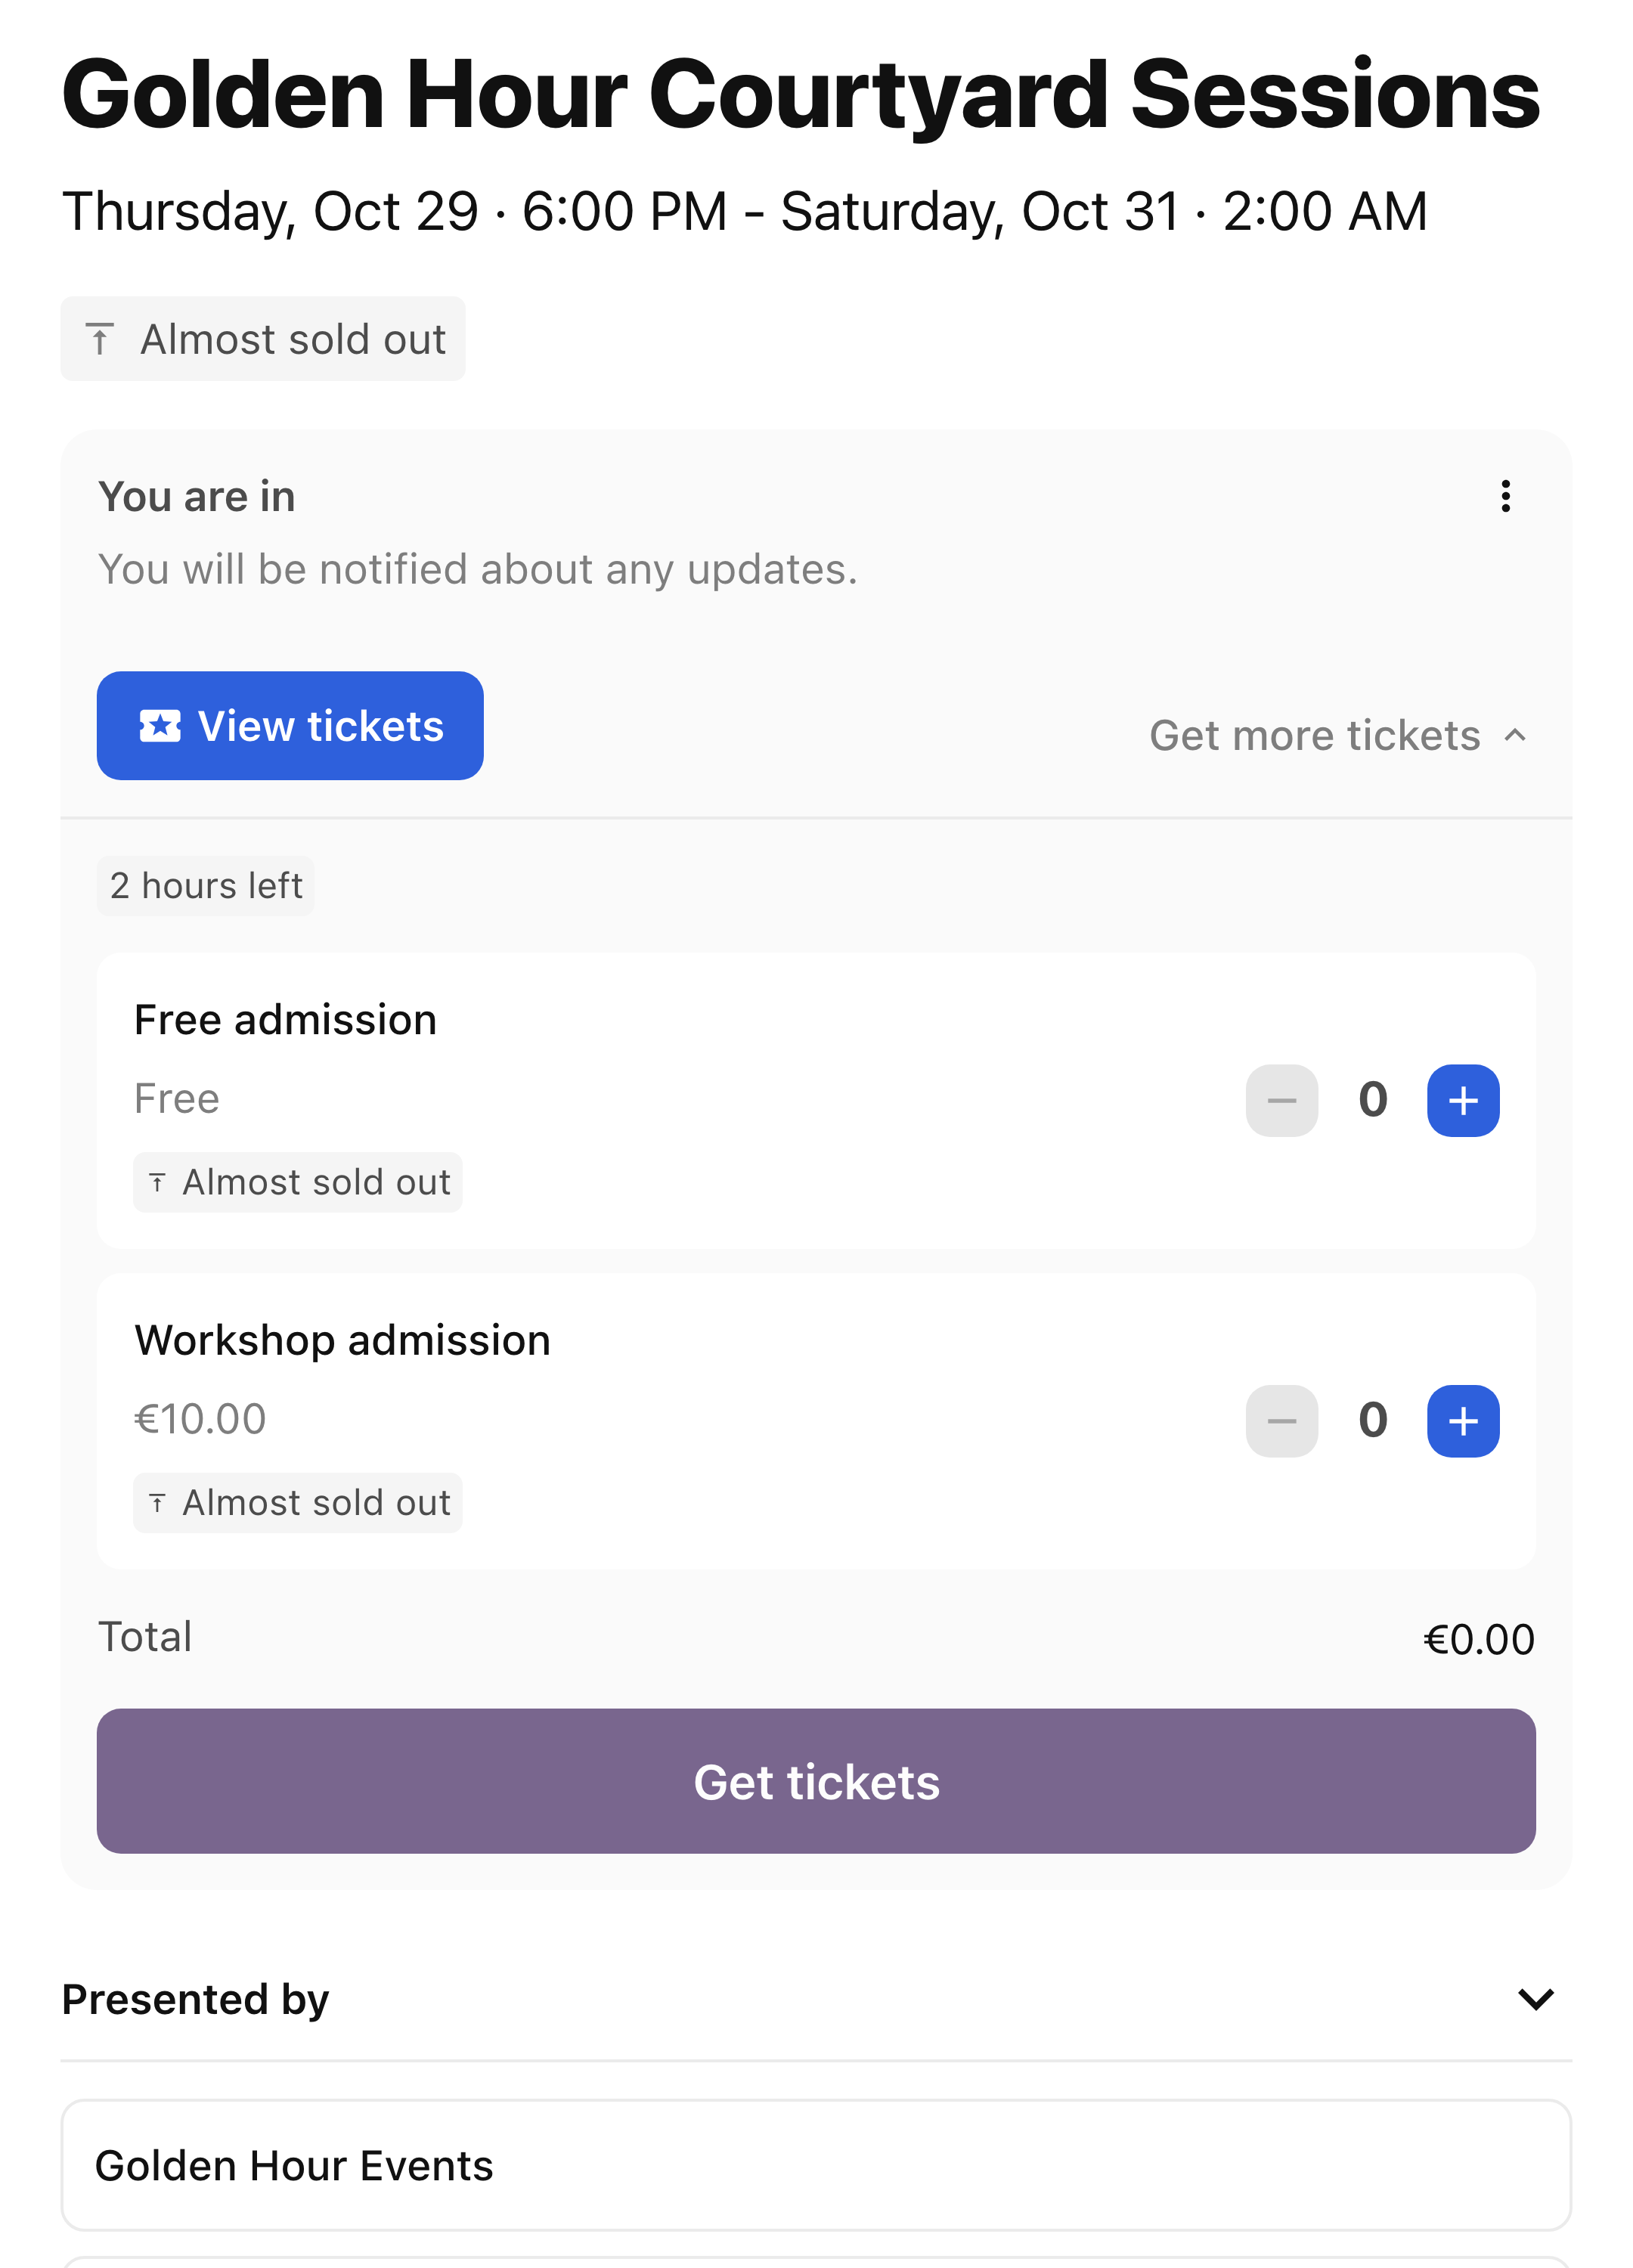
For other audiences, use the event’s Ticket sales page. See Set up a presale or Create a custom ticket sale. Tickets can be used in several sales, so inspect the In sale column before changing a shared ticket’s name, price or stock.
Ask a question for one ticket type
Use Ticket-specific questions when only people obtaining a particular ticket should answer, such as a question for Workshop admission. These questions belong to the ticket type, so check which sales use that ticket before changing them. They are separate from general event registration and personal-information questions.
Open the ticket question settings
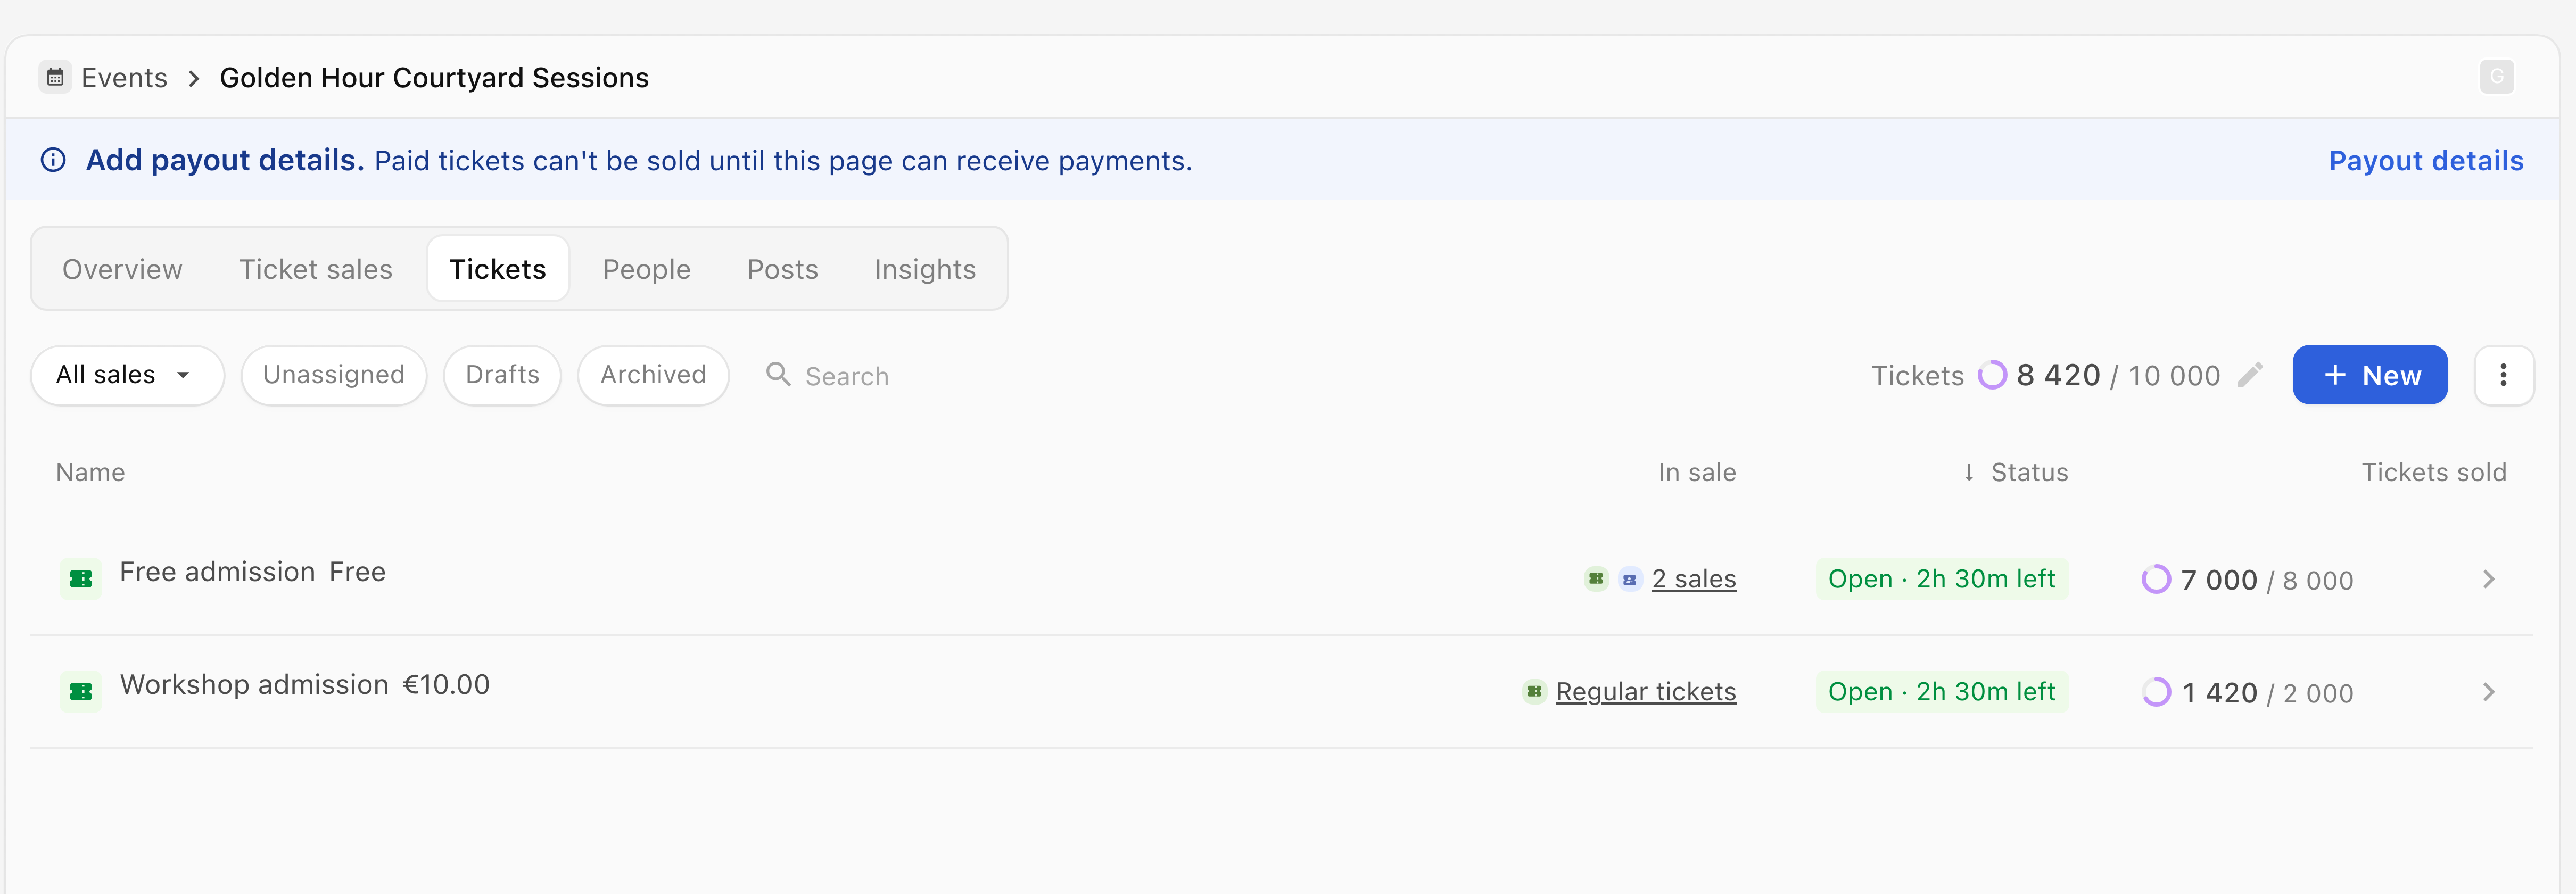
- Open the event's Tickets catalogue.
- Open the actions menu beside the intended ticket and select Edit ticket.
- Expand More settings, then Ticket-specific questions and select Add question.
Write and add the question
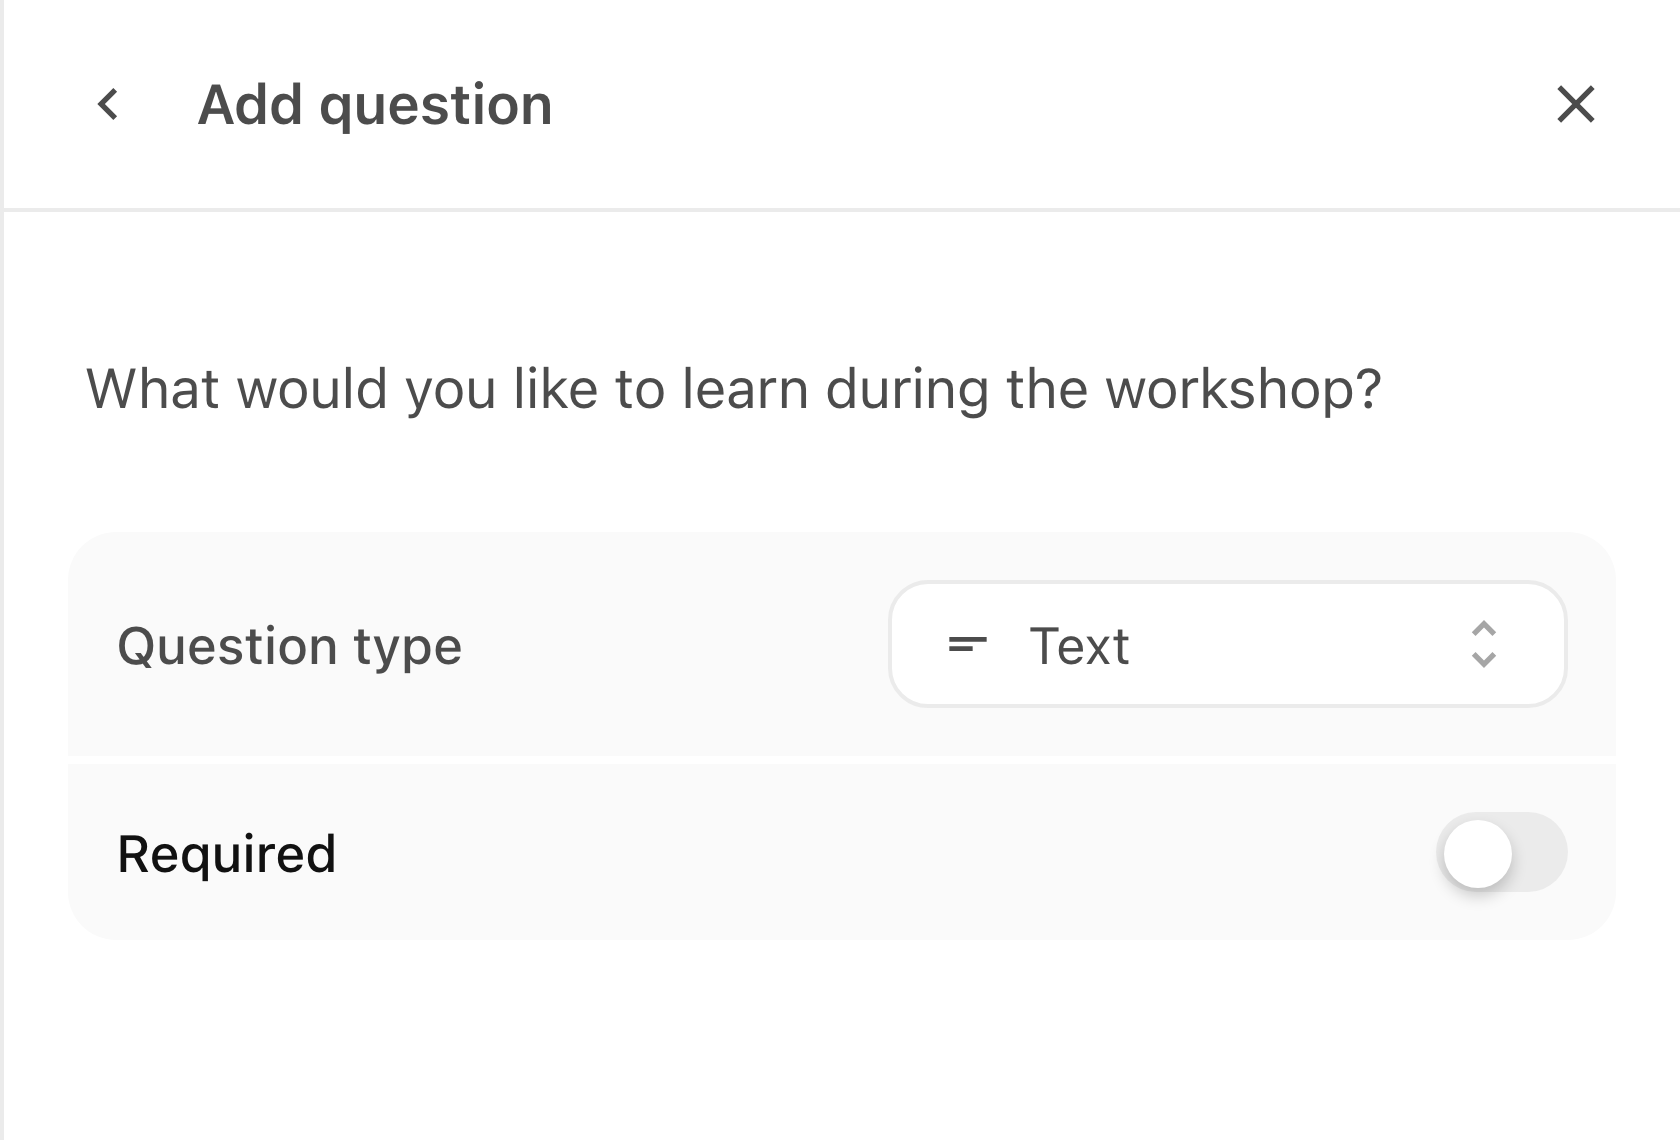
- Enter the question, for example, “What would you like to learn at the workshop?”
- Choose Question type. Use Text for a written answer, or select the appropriate answer format and complete any options it requires.
- Turn Required on if an answer is necessary; leave it off for an optional question.
- Select Add question to put it into the ticket's working copy.
Save and check the ticket
- Check that the question appears under Ticket-specific questions. Open it again if you need to correct it before saving.
- Select Save changes in Edit ticket to persist the ticket changes.
- Reopen the same ticket and check that its question is still listed.
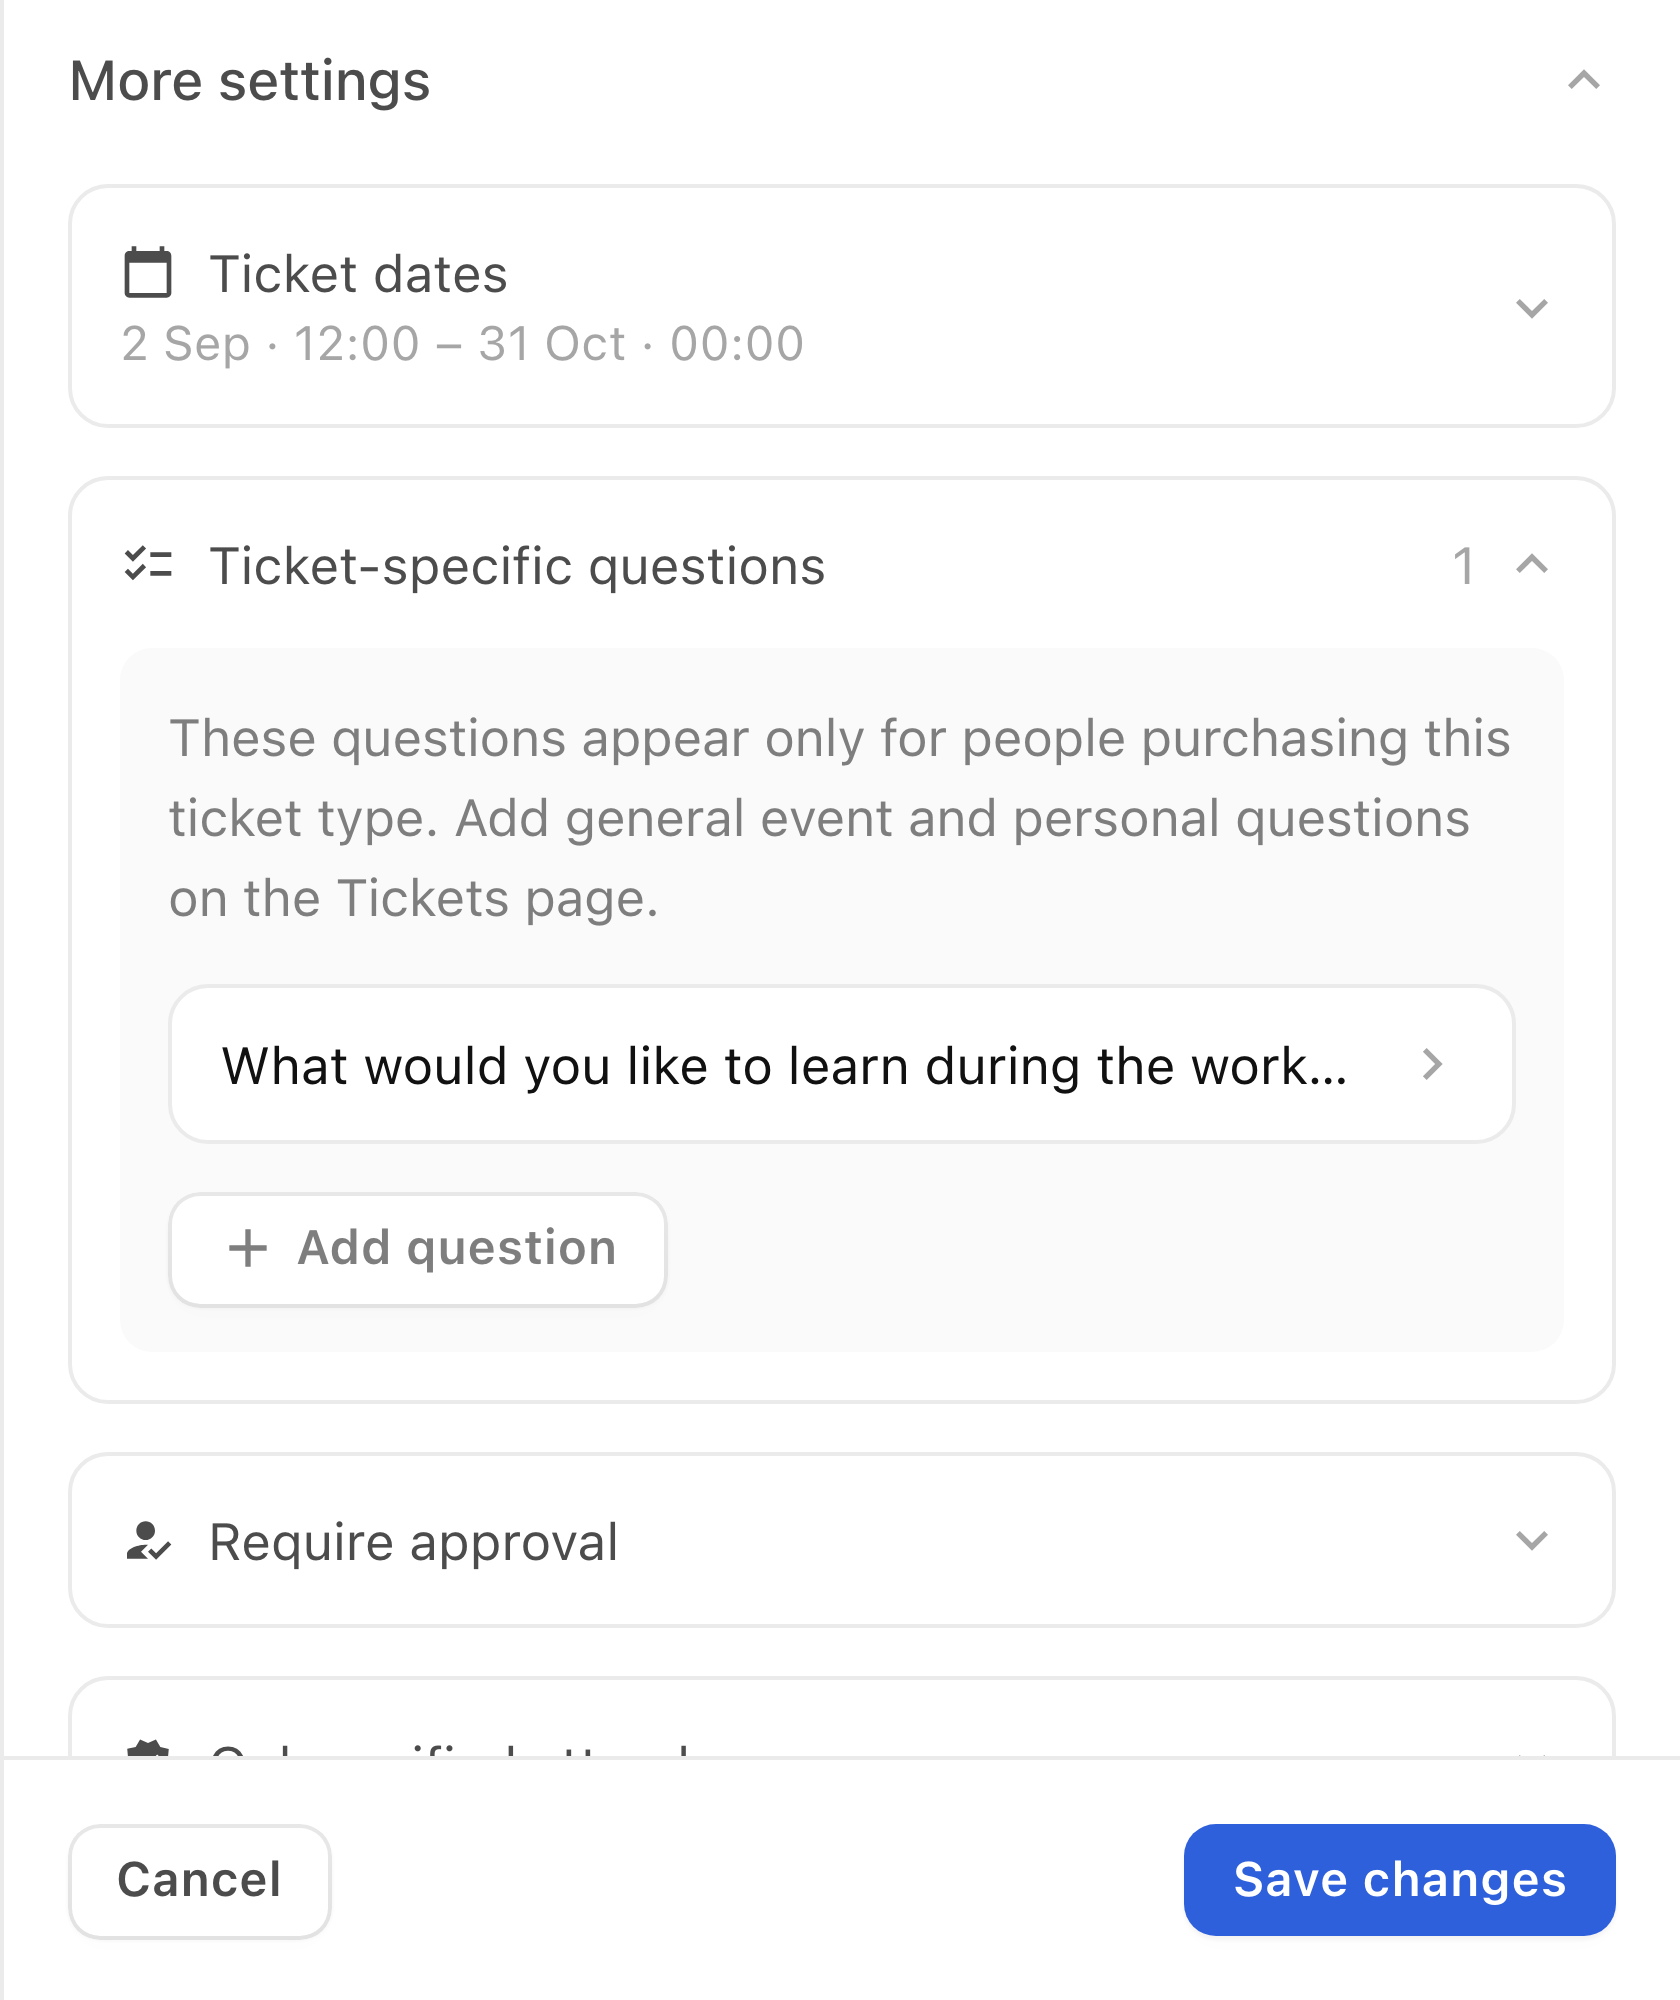
To abandon the ticket changes, select Cancel and follow any discard confirmation. If the question text or answer format is locked when editing an existing question, do not assume it can be rewritten; check the available controls before changing the ticket.
Export attendee data for an agreed import
Use this only after your receiving provider confirms the data and admission process it needs.
- Open the event's People page and check the list or filters cover the intended community allocation.
- Open More options and select Export to download the current list as a CSV.
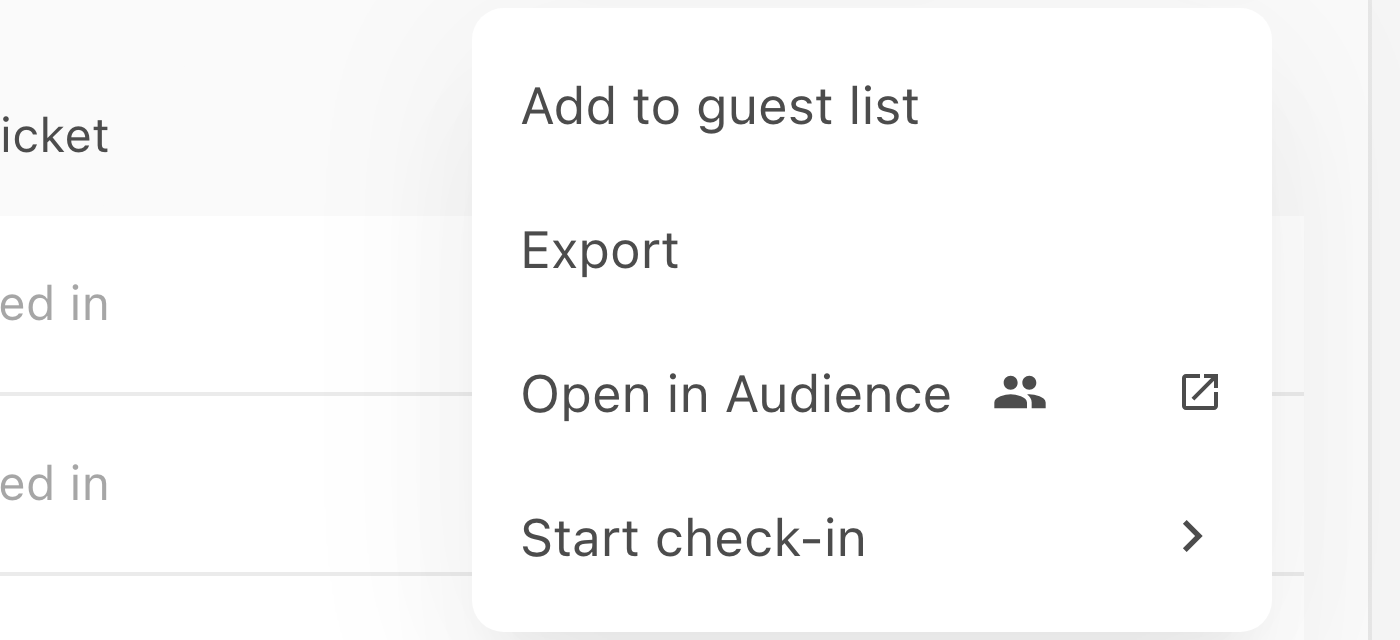
- Check the export against your provider's requirements and use its agreed import process. Confirm the result with that provider before telling attendees which ticket to use.
This exports attendee data, not a provider-compatible ticket file with BASH barcodes. Keep the file private and share it only with the team handling the agreed import. Exporting does not remove attendees or tickets from BASH.
Review what attendees pay
- When payout setup is complete, open Settings → Ticketing → Sell directly through BASH and check the fee information. Fee controls depend on your organisation’s payment setup.
- Open checkout for the intended sale and check the amount shown.
- To investigate an amount, compare the actual order and invoice.
For the default VAT setting for new tickets:
- Open Settings → Ticketing → Ticket VAT.
- Check the setting and ask your accountant to confirm the rate that applies. See Check VAT and ticket invoices.
If the ticket does not appear for attendees
- Check In sale.
- If it shows Add to sale, follow the regular-sales procedure above.
- If it names a sale, check that sale’s opening and closing dates, ticket stock and access requirements.
If Price is disabled:
- Select Add payout details to charge for tickets.
- Resolve the setup status before changing the price.
If saving shows an error, keep the entered details and read the message before trying again.
If you cannot continue:
- Select Need more help? Message support below this article.
- Include the organisation, event, ticket name, step reached and exact message.
- Select Open support message, then review and send the draft.
Do not include payment credentials or private ticket links.
For entry management after sales, see Check in attendees at your event.